none/417 4705 Squid Proxy Error

Maybe You can see a 4705 error or somewhat in your squid logs?

I just had a problem where Guncraft would tell me that it could not sync with steam and could only play in offline mode. But wait a minute… my friends can play! Sure enough a weird line in the proxy logs!  This is a Squid3 issue but we can fix it.

Fix:

Add the line: 

ignore_expect_100 on

to your /etc/squid3/squid.conf file


Other apps that can have this problem:

AppBrain
Facebook Contact Sync
BOINC

Posted in Linux | Tagged , , , , , , | Leave a comment

Looking for Wasted HD Space on the Raspberry Pi

Twice now I’ve ran out of space on my Raspberry Pi. First time I freed up some space and the second time that happened not to long after I went looking for the problem. This is how I found it…

danger@dangerpi ~ df -h
Filesystem      Size  Used Avail Use% Mounted on
rootfs          3.7G  2.9G  643M  82% /
/dev/root       3.7G  2.9G  643M  82% /
devtmpfs        180M     0  180M   0% /dev
tmpfs            38M  1.3M   37M   4% /run
tmpfs           5.0M     0  5.0M   0% /run/lock
tmpfs            75M     0   75M   0% /run/shm
/dev/mmcblk0p1   56M   20M   37M  35% /boot
tmpfs            75M     0   75M   0% /tmp
/dev/sda1       925G  898G   27G  98% /mnt/DangerDrive

rootfs and /dev/root are the same thing in this case, the RPis SDCard. The above is after I found the culprit and cleaned it out. Now lets drill into it a little more

danger@dangerpi / $ sudo du -sh *
5.2M    bin
19M     boot
0       dev
4.8M    etc
3.3M    home
50M     lib
16K     lost+found
4.0K    media
898G    mnt
36M     opt
du: cannot access `proc/12707/task/12707/fd/4': No such file or directory
du: cannot access `proc/12707/task/12707/fdinfo/4': No such file or directory
0       proc
28K     root
1.3M    run
5.9M    sbin
4.0K    selinux
4.0K    srv
0       sys
0       tmp
1.3G    usr
661M    var

Aha! We can see which folders take up all the space!

danger@dangerpi /var/log $ sudo du -sh *
0       alternatives.log
4.0K    alternatives.log.1
4.0K    alternatives.log.2.gz
4.0K    alternatives.log.3.gz
4.0K    alternatives.log.4.gz
173M    syslog.1
0       syslog.1.gz
940K    syslog.2.gz
904K    syslog.3.gz
4.0K    user.log.4.gz
8.0K    wtmp
220K    wtmp.1
12K     Xorg.0.log

I’ve cut this down a a little but look at that syslog file! Perty big for a log file. What was happening once I had a look at it was transmission which runs on this particular Pi was spamming errors about not being able to find some files. I deleted the logs taking up all the space with

sudo rm -f syslog.*

and then removed the offending files from transmission. Hopefully this proves to be the root of the problems.

Posted in Computing, Linux, Raspberry Pi | Tagged , , | 1 Comment

Transparent Squid3 Proxy Setup

You probably don’t really need a caching proxy on your home network but hey, why the hell not. You can pull some decent stats out of it over time. Most popular sites, biggest net users etc. etc. I have to admit to loving stats…. and graphs. I’m not sure of the appeal, I just like to see them. One of my all encompassing projects is to setup a sensor network around the house reporting into a MYSQL  back-end with a PHP front end serving up the graph love. But I digress! Lets setup Squid3!

This is what we need:
Spare PC
2 Network ports
Spare time

Home_Proxy


The great thing about making the Proxy transparent is there is no need to configure any browser settings! You simply send all your network traffic over the interface bridge on your proxy box and then magic kicks in! First thing we should do is get get Linux. Steep learning curve. Frustrating as hell when it doesn’t work but perseverance pays off and you will be a better person in the end. For this particular build I used Ubuntu 12.04. Once you have the image you can burn it to disk or whack it on a key. Who the hell burns DVD’s these days? Do your self a good one and chuck it on a key. There are some really great apps that can build a bootable key for you and they are free. You just point them at the ISO and away you go. I’m going to skip over the pretty standard stuff like installing Ubuntu but if you need help drop a comment and I’ll see what I can do.

So you are now looking at your new Ubuntu Desktop, Mmmm Juicy! Press the windows key and type it terminal…. now click the terminal icon. Bam! This is where we live. Make a shortcut for it on the desktop or wherever you like and fire it up.

Lets get the new install up to date

sudo apt-get update
sudo apt-get upgrade

Now lets install the stuff we will need

sudo apt-get install squid3 bridge-utils ebtables

Now we will setup Squid

sudo nano /etc/squid3/squid.conf

Change/add the appropriate lines to the below

http_port 3128 transparent
acl localnet src <strong>192.168.0.0</strong>/24
acl localhost src 127.0.0.1/255.255.255.255
http_access allow localnet
http_access allow localhost
cache_dir ufs /var/spool/squid3 5000 16 256

Please take note of the bolded IP address. Change this to suit your home network setup. Say your computer IP is 172.16.0.10… You would update the above to 172.16.0.0/24. Press Ctrl-X, answer yes to keep changes and press enter to overwrite the current file. Now we will restart squid….

sudo /etc/init.d/squid3 restart

Now we can configure the network to pass all the data from one ethernet card to the other while redirecting port 80 (http) to port 3128(Proxy) before sending on to the interwebs.

sudo ebtables -t broute -A BROUTING -p IPv4 --ip-protocol 6 --ip-destination-port 80 -j redirect --redirect-target ACCEPT
sudo iptables -t nat -A PREROUTING -i br0 -p tcp --dport 80 -j REDIRECT --to-port 3128

We also need to enable traffic to be passed through for both IPv4 and IPv6 on your proxy PC by uncommenting the following lines in sysctl.conf.

sudo nano /etc/sysctl.conf
(remove the # to uncomment these lines)
net.ipv4.ip_forward=1
net.ipv6.conf.all.forwarding=1

Now to the NIC configs!

sudo nano /etc/network/interfaces
auto lo
iface lo inet loopback
auto eth1
iface eth1 inet static
address 192.168.0.3
netmask 255.255.255.0
network 192.168.2.0
broadcast 192.168.2.255
 
auto br0
iface br0 inet static
address 192.168.0.2
netmask 255.255.255.0
network 192.168.2.0
broadcast 192.168.2.255
gateway 192.168.2.1
bridge-ports eth0 eth1

Save the file and either reboot the system or just the services with:

sudo /etc/init.d/networking restart
sudo service squid3 restart

This is a good time to make sure you disconnect the cable between your router and switch. As in the top diagram you should have Router –> br01 eth1 –> Switch

Jump on the net from another pc and browse some pictures of cats. Bounce back to your proxy terminal and….

sudo tail /var/log/squid3/access.log -f

This is the live Proxy log of everything hitting your proxy. Sweet huh? Its interesting just to watch what actually goes out of your network. You may feel your eyes drawn to the screen for awhile just to watch. Maybe that’s just me though 🙂 That wasn’t so hard! All going well you’re seeing some impressive shit. All not going well you are cursing and wondering what the hell to do now. I had such problems so lets go over them. Due to me deciding to re-organize my network IPs my proxy box didnt get a DNS server to use.

sudo nano /etc/resolv.conf
nameserver <strong>192.168.0.1</strong>(Your router or DNS server)
nameserver 8.8.8.8(Secondary google open DNS server)

That fixed DNS.

The other problem I had was having 2 gateways set in /etc/network/interfaces. One for each NIC. This caused two default IP routes and basically screwed me and the network for hours! You will see a rtnetlink error when trying to bring up the network interfaces if you are having much the same thing.

As I hopefully remembered to mention at the start of this post, You dont need to actually change anything on your local computers to have the traffic flow through your proxy. Wireless devices however are a little harder to deal with. The simple way is to just enter the proxy details manually on these devices. Those details being the IP of your proxy bridge interface(192.168.0.2) and the port (3128).



Posted in Linux, Networking | Tagged , , , , , , , , , , , | 6 Comments

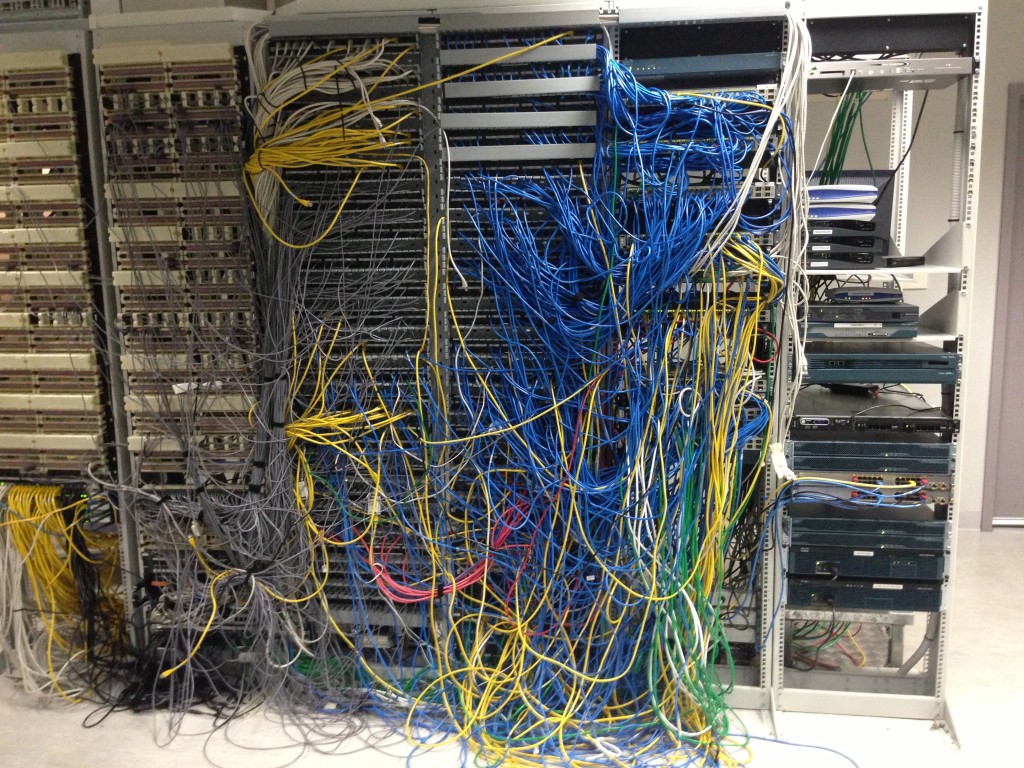
Kill It NOW Patch Cabling!


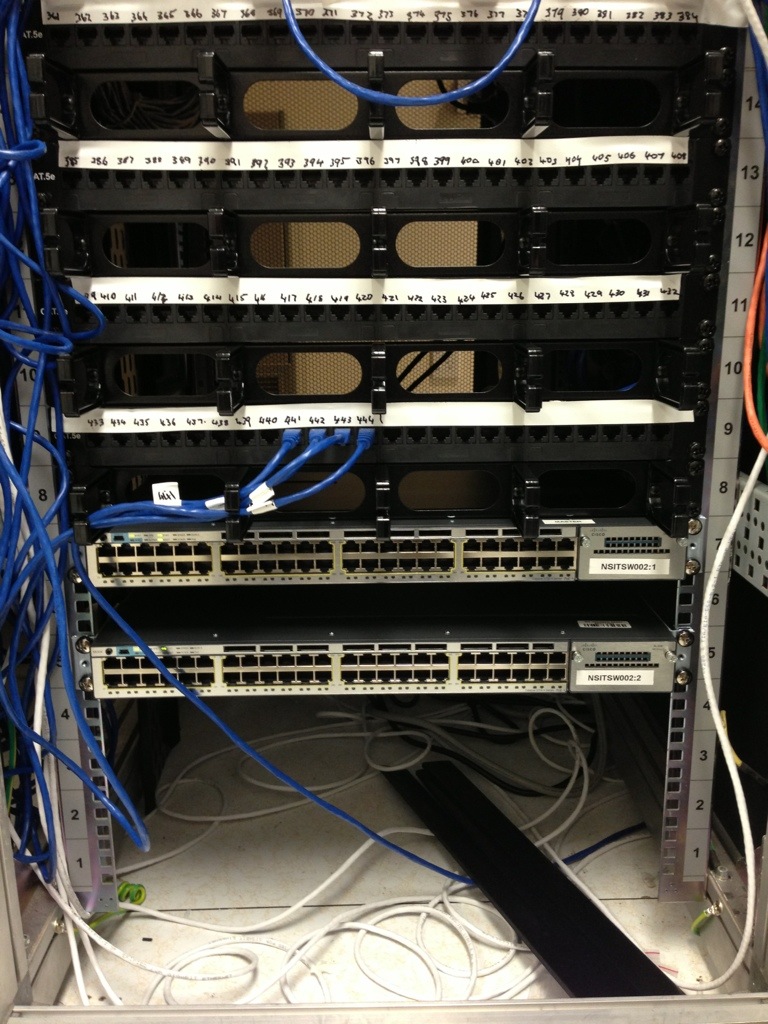
Opposing the sexy patch cabling from last month here we have the opposite! While certainly having more character it just doesn’t have the sexy. Three IT Trainees have been found dead in this nest of Cable madness! Very limited cable management can help cabling get like this. On the flip side it can get MUCH worse than this 🙂stuff 002

Posted in Computing, Networking | Tagged , , , | Leave a comment

A Big Fuck Off Knife

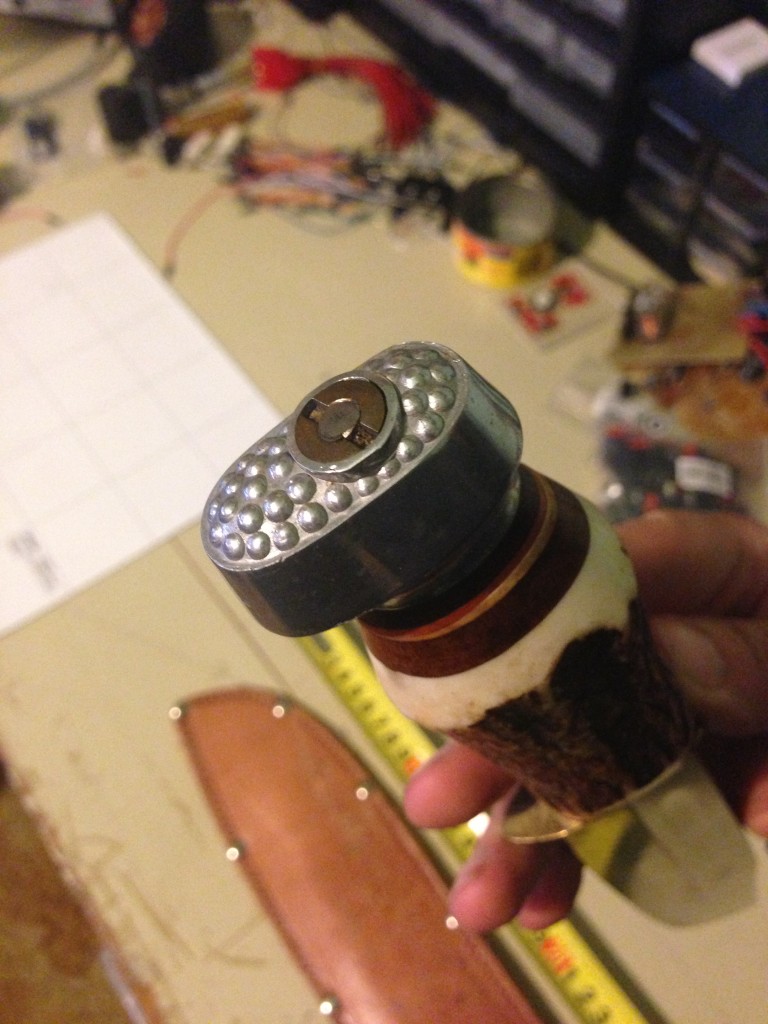
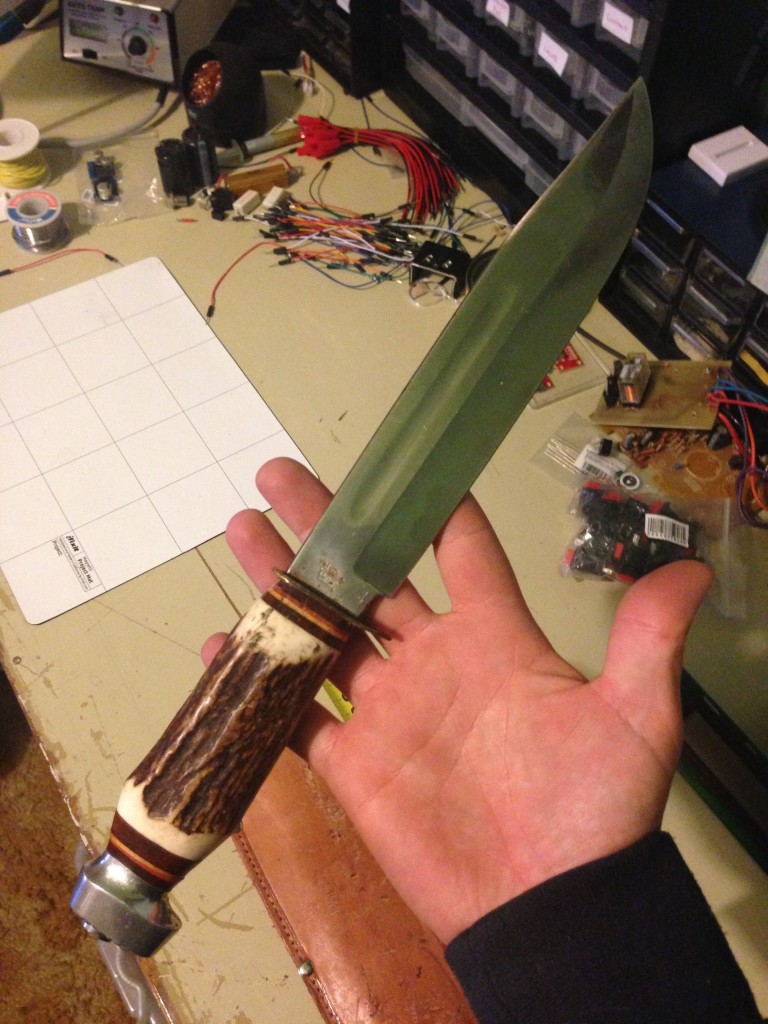
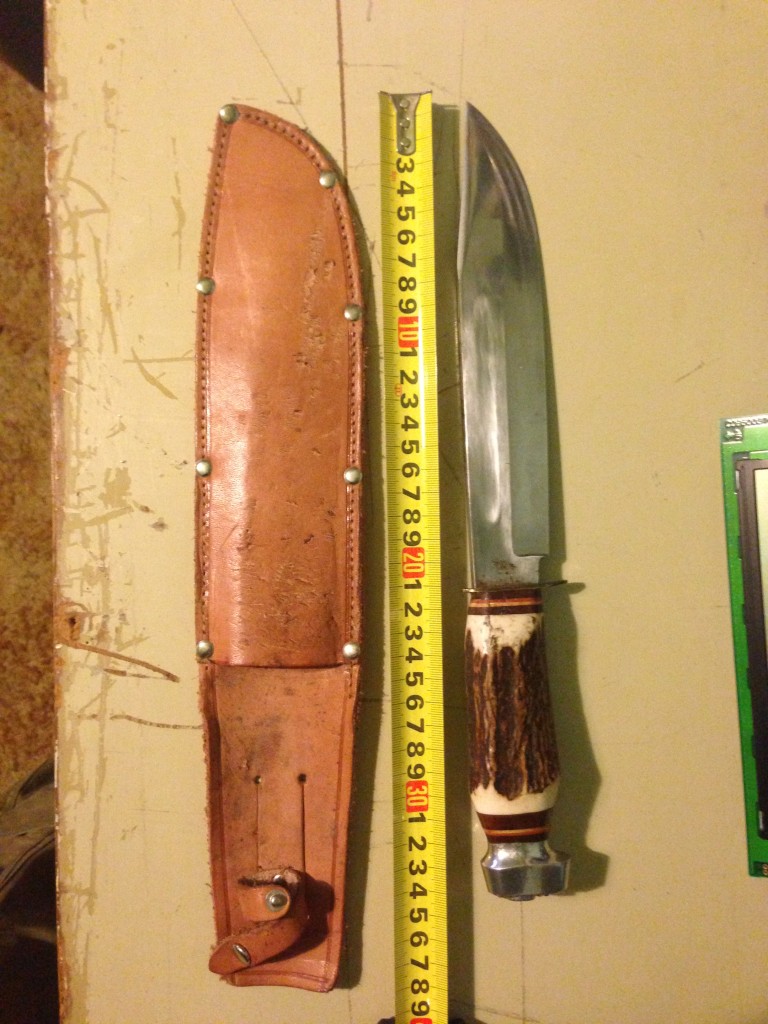
I got a new knife the other day to add to the collection. It’s a Widder brand, made in Solingen Germany. Solingen is the City of swords and has produces all types of blades for many years. Some really nice stuff comes out of there. This particular knife does not feel like high quality steel but is in most excellent condition! It’s dated sometime before 1974 and has an aluminium pommel with some detail on the end. Decent sized Stag Handle that looks nicely made. At 34 cm long I can’t imagine wearing this bad boy around unless a need to re-enact the “That’s not a knife… This is a knife!” scene from the movie  Crocodile Dundee came up.  This knife does not appear to have ever been sharpened! Maybe one day I’ll need to run down a Buffalo. I can use it then 🙂

stuff 040 stuff 041 stuff 038 stuff 039

Posted in Blades, Fixed Knives | Tagged , , , , | Leave a comment

Water Flow Meter Mk. II


Further News:
Tried it out again today. Could see it ticking by no probs. Judged the flow meter at its pressure and flow rate to be down by 20%. So every 1 litre pumped into a bucket would only report 0.8 litres on the Arduino  This is easily remedied in the Arduino sketch. These flow meters are inaccurate but you can do some controlled tests to improve the accuracy at a certain pressure of water. How much water did I pump you say? Well…… I went a bit low in the tank and sucked up a heap of gunk! The pump loves it but the water flow meter did not. Nothing I did could get it going again. So! Version 3 will require a filter 🙂

A short post requires entertainment:

DvbaGLj


Posted in Fish Pond, Gardening | Tagged , , , , , | Leave a comment

Let’s Get it Pumpin’

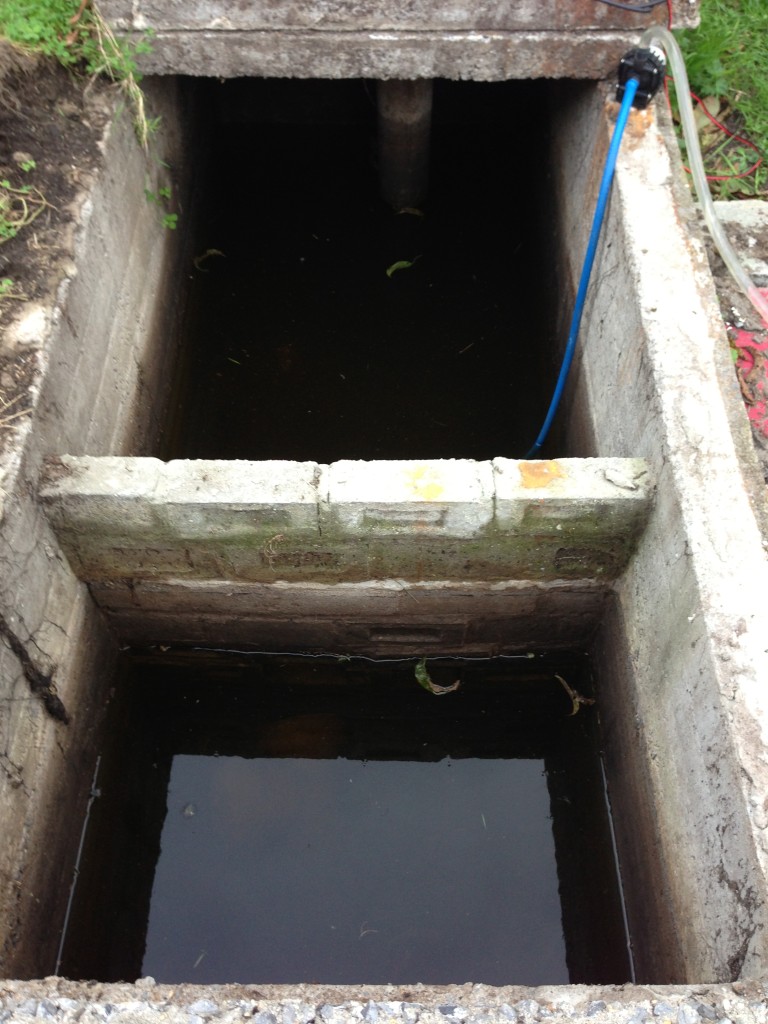
While I was away it seems I had some rain at home. Septic is half full again! Blast! Missed out on seeing how the water is getting in.

nz 125

At least I have a good excuse to play with pumps again! This time to spice things up I thought I’d try and monitor how much water gets pumped out! Yeah! You can see in the above shot how small the pump is I’m using…. Does a good job lifting all that water so far.   I slapped this beast together:

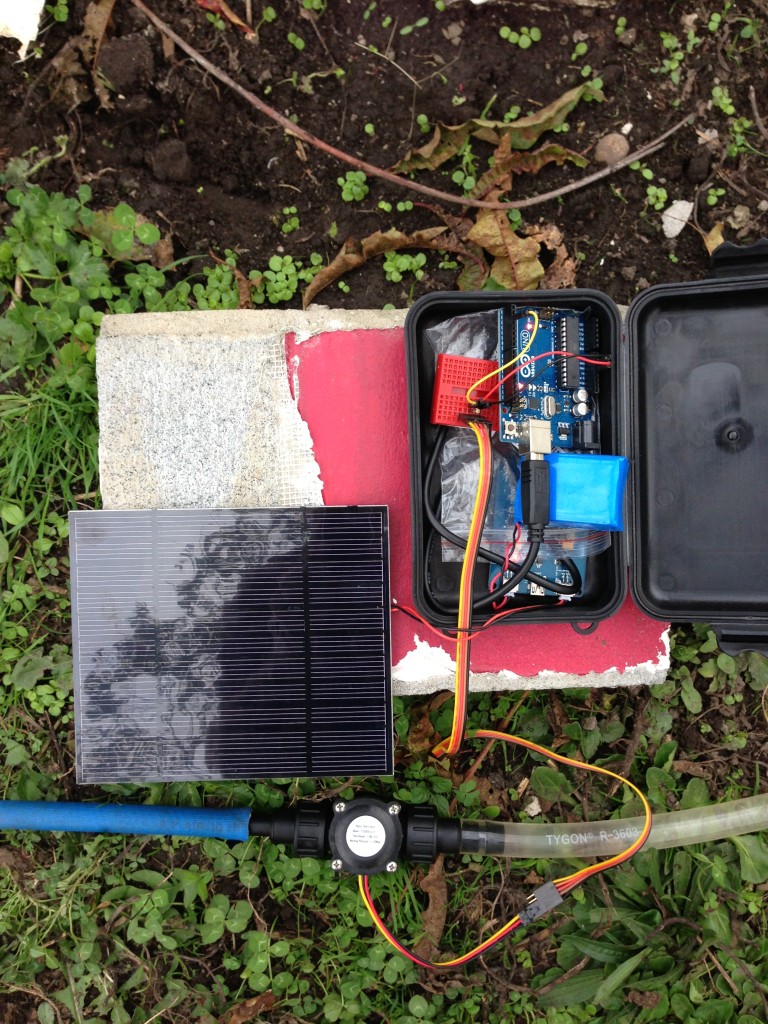
nz 124Crammed in that little box we have a solar lithium battery charger hooked up to a 3.7V 3000mAh Li-ion batter and the biggest solar panel I have laying around….. I forget its watts but know it provides 3.6 on the voltage side of things. This in turn has an Arduino UNO plugged in. Portable powah! Wrangled off that we have a simple cheap water flow meter with a couple of standard poly pipe fittings to attach the hoses to. These can be had from any decent hardware store. It was looking like it may rain thus it all being crammed into the box. The plastic you can see in the box is a precaution to stop any of the circuitry shorting out across the 2 boards.

The pumps in the outlet line and the party is about to start! I had no problem getting the pump primed this time. I dicked around with it a whole lot the last time and got it down pat pretty well. Attach garden hose to output side of hose coming from the pump and push the water flow through backwards until all the air has blown out. Turn pump on and garden hose off and voila! Lots of flow!

nz 123

That pumped happily for a few hours no problems. Just on dark though it started to really rain so I packed the gear up just short of the tank being empty. No probs! I have stats to check off the Arduino! After unpacking it from the box carefully I realized a flaw in my plan….. How was I do get the data out of it? Ha! Foiled! Rebooting the Arduino would wipe said data. OK that’s great Ill just hook it up to USB and turn the serial port viewer on….NO! That auto causes the Arduino to reboot! Luckily the code I used verbatim from Adafruit had a 2×16 LCD hooked up to it that I decided not to bother with. Cool, cool. A bit more time and we were away…

nz 128


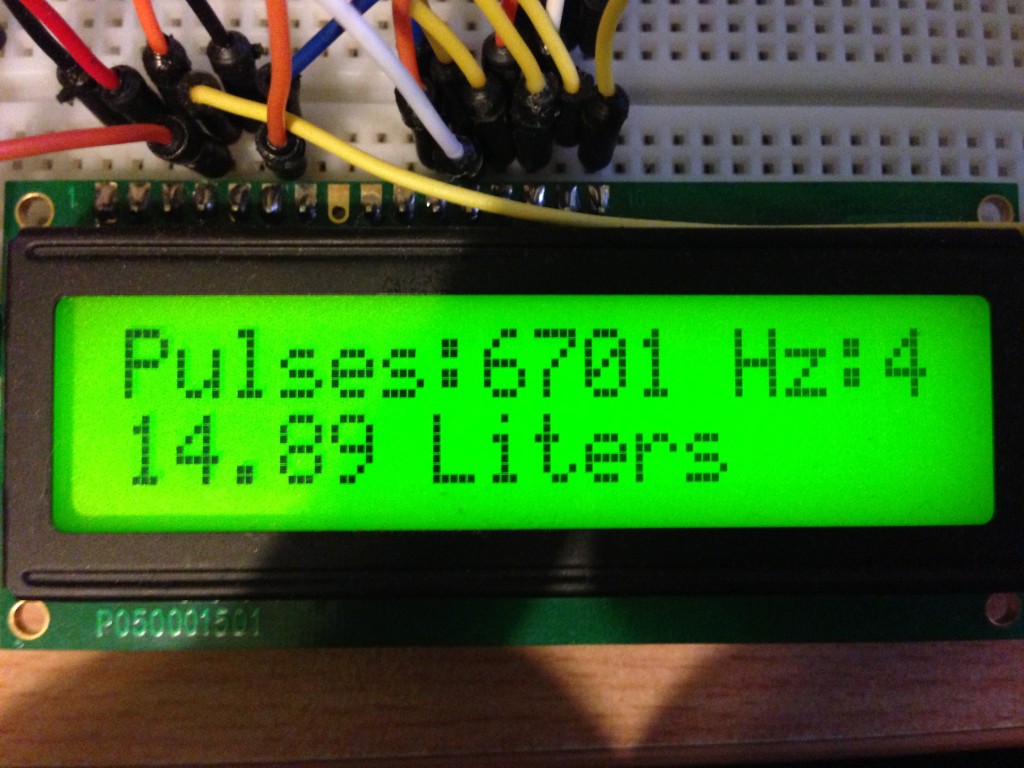
14.89 Litres?!?!?!?!! What is this black magic! Look at that water flowing in the pic up the page. That’s hundreds of litres over a few hours! Hundreds! I think what happened, and I’m sad to say it but I must of temporarily knocked the power from the little bread board or something. That or there wasn’t enough pressure to spin the water meter. So first attempt = Fail. Second attempt tomorrow shall wield better results. I can monitor it live with the LCD hooked up now.

Here is the code used from Adafruit. You can buy many fantastic things from there so go do it and support a great company /plug over

1
2
3
4
5
6
7
8
9
10
11
12
13
14
15
16
17
18
19
20
21
22
23
24
25
26
27
28
29
30
31
32
33
34
35
36
37
38
39
40
41
42
43
44
45
46
47
48
49
50
51
52
53
54
55
56
57
58
59
60
61
62
63
64
65
66
67
68
69
70
71
72
73
74
75
76
77
78
79
80
81
82
83
84
85
86
87
88
89
90
91
92
93
94
95
96
97
98
99
100
101
102
103
104
105
106
107
/**********************************************************
This is example code for using the Adafruit liquid flow meters. 
 
Tested and works great with the Adafruit plastic and brass meters
    ------&gt; http://www.adafruit.com/products/828
    ------&gt; http://www.adafruit.com/products/833
 
Connect the red wire to +5V, 
the black wire to common ground 
and the yellow sensor wire to pin #2
 
Adafruit invests time and resources providing this open source code, 
please support Adafruit and open-source hardware by purchasing 
products from Adafruit!
 
Written by Limor Fried/Ladyada  for Adafruit Industries.  
BSD license, check license.txt for more information
All text above must be included in any redistribution
**********************************************************/
#include "LiquidCrystal.h"
LiquidCrystal lcd(7, 8, 9, 10, 11, 12);
 
// which pin to use for reading the sensor? can use any pin!
#define FLOWSENSORPIN 2
 
// count how many pulses!
volatile uint16_t pulses = 0;
// track the state of the pulse pin
volatile uint8_t lastflowpinstate;
// you can try to keep time of how long it is between pulses
volatile uint32_t lastflowratetimer = 0;
// and use that to calculate a flow rate
volatile float flowrate;
// Interrupt is called once a millisecond, looks for any pulses from the sensor!
SIGNAL(TIMER0_COMPA_vect) {
  uint8_t x = digitalRead(FLOWSENSORPIN);
 
  if (x == lastflowpinstate) {
    lastflowratetimer++;
    return; // nothing changed!
  }
 
  if (x == HIGH) {
    //low to high transition!
    pulses++;
  }
  lastflowpinstate = x;
  flowrate = 1000.0;
  flowrate /= lastflowratetimer;  // in hertz
  lastflowratetimer = 0;
}
 
void useInterrupt(boolean v) {
  if (v) {
    // Timer0 is already used for millis() - we'll just interrupt somewhere
    // in the middle and call the "Compare A" function above
    OCR0A = 0xAF;
    TIMSK0 |= _BV(OCIE0A);
  } else {
    // do not call the interrupt function COMPA anymore
    TIMSK0 &amp;= ~_BV(OCIE0A);
  }
}
 
void setup() {
   Serial.begin(9600);
   Serial.print("Flow sensor test!");
   lcd.begin(16, 2);
 
   pinMode(FLOWSENSORPIN, INPUT);
   digitalWrite(FLOWSENSORPIN, HIGH);
   lastflowpinstate = digitalRead(FLOWSENSORPIN);
   useInterrupt(true);
}
 
void loop()                     // run over and over again
{ 
  lcd.setCursor(0, 0);
  lcd.print("Pulses:"); lcd.print(pulses, DEC);
  lcd.print(" Hz:");
  lcd.print(flowrate);
  //lcd.print(flowrate);
  Serial.print("Freq: "); Serial.println(flowrate);
  Serial.print("Pulses: "); Serial.println(pulses, DEC);
 
  // if a plastic sensor use the following calculation
  // Sensor Frequency (Hz) = 7.5 * Q (Liters/min)
  // Liters = Q * time elapsed (seconds) / 60 (seconds/minute)
  // Liters = (Frequency (Pulses/second) / 7.5) * time elapsed (seconds) / 60
  // Liters = Pulses / (7.5 * 60)
  float liters = pulses;
  liters /= 7.5;
  liters /= 60.0;
 
/*
  // if a brass sensor use the following calculation
  float liters = pulses;
  liters /= 8.1;
  liters -= 6;
  liters /= 60.0;
*/
  Serial.print(liters); Serial.println(" Liters");
  lcd.setCursor(0, 1);
  lcd.print(liters); lcd.print(" Litres        ");
 
  delay(100);
}
Posted in Arduino, Electronics, Fish Pond, Gardening | Tagged , , , , , , , , | Leave a comment

Nice GLCD Sir!

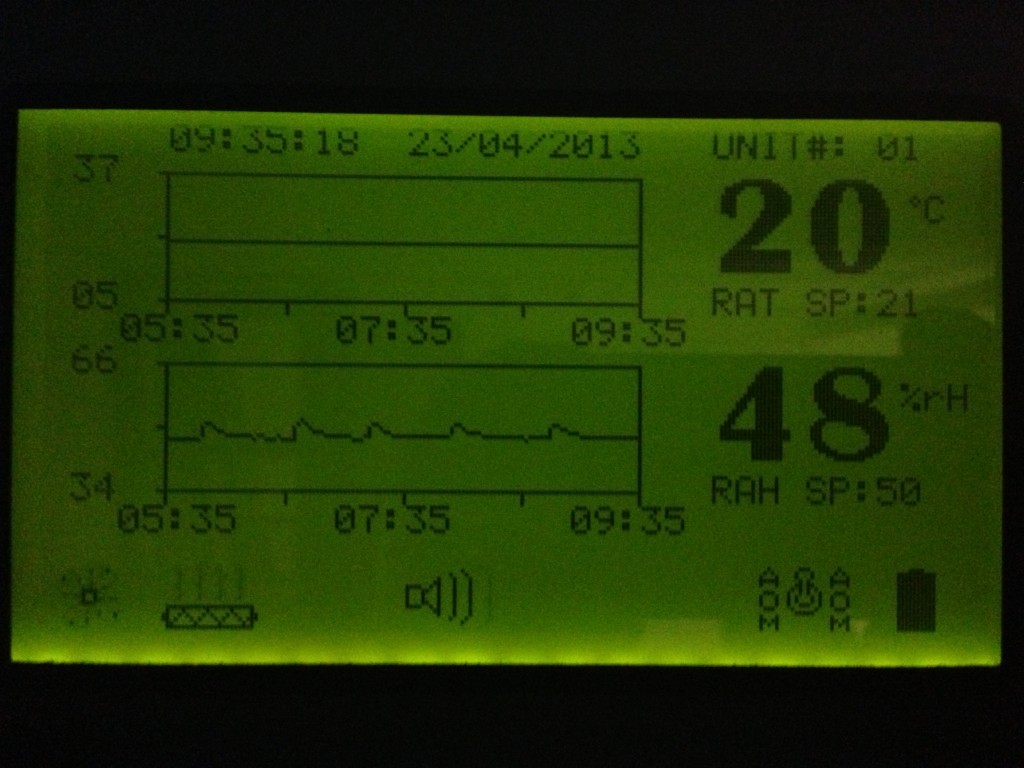
While I was off Parading around in New Zealand (15/04 – 26/04/2013) I came across this bad boy:

IMG_0830


Not only is it the biggest resolution(?x?) Graphic LCD I’ve seen but also made use of, in a most awesome way. Information is displayed in an easy to read way and look! Graphs! I had actually been thinking of the same type of graphs for another project I have been working on. I figured out how to do the code side but needed a Real Time Clock (RTC) for the Arduino and a SD Card reader/writer so couldn’t bring to fruition. Fear not however! These items have since arrived at my door so I can try and bring it to life! More on that project later……


By the way, this display was utilized on an industrial sized Air Conditioner unit. Probably around 10 years old.

Posted in Electronics | Tagged , , | Leave a comment

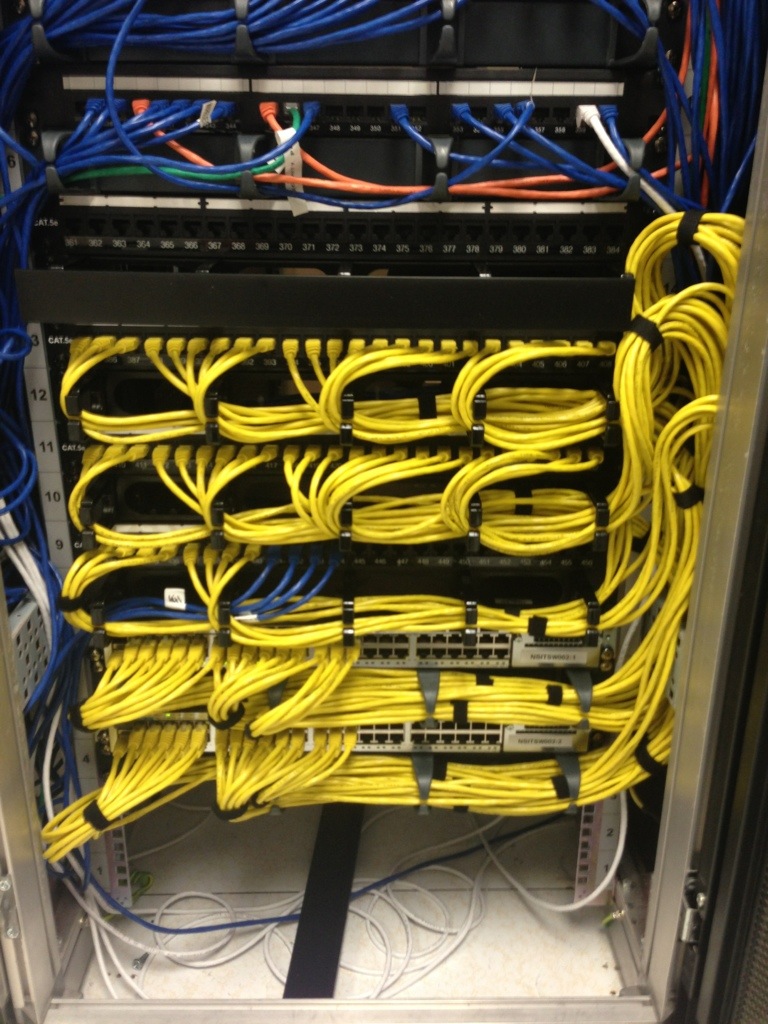
Sexy Sexy Patch Cabling

It’s always a pleasure to see a good patch job.

Also first post to the blog from my iPhone. Will try from the Nexus 10 next time, should be better!

20130422-191745.jpg

20130422-191801.jpg

Posted in Networking | Tagged , , , | 2 Comments

Dark Places

IMG_0795

Extending the test code I built-in yesterdays LED post, I’ve  added a PIR motion sensor and a LDR (light detection) What we now have is when motion is detected AND the light level is below a certain level the LED’s will fade on to full brightness, stay on until motion is no longer detected and then fade down until off. A bit sexier than just on and off 🙂 I plan on setting something like this up using LED strips or the 2W LED’s. Living in an older house means that there’s not as many light switches nor sometimes enough lighting in the first place. Some of the hallways and outside entrances could really benefit from some sexy automatic lighting. I will rig something together temporarily soon(tm) to get the light thresholds correct before designing a nice encased unit.

Below is the code as it currently stands. Feel free to recommend improvements!

1
2
3
4
5
6
7
8
9
10
11
12
13
14
15
16
17
18
19
20
21
22
23
24
25
26
27
28
29
30
31
32
33
34
35
36
37
38
39
40
41
42
43
44
45
46
47
48
49
50
51
52
53
54
#define LEDPin 6 //pin feeding TIP120
#define onboardLED 13 //onboard LED for some debugging
#define motionPin 4  //PIR connection
#define fadeSpeed 10 //Adjust how fast slow you want the fade effect to function
#define lightPin 5 //LDR connection
 
int led;
int motion;
int counter = 0;
int light;
 
void setup() {
//set pinmodes
  pinMode(LEDPin, OUTPUT);
  pinMode(onboardLED, OUTPUT);
  pinMode(motionPin, INPUT);
  pinMode(lightPin, INPUT);
  Serial.begin(9600); //start-up serial for outputting debug info
  int motion = LOW;
  led = 0;
 
}
 
void loop() {
 
  light = analogRead(lightPin); //read light levels
  Serial.print("Light Level: "); 
  Serial.println(light);  //send light levels to serial
  motion = digitalRead(motionPin); //read motion from PIR
 
  Serial.print("Motion: "); 
  Serial.println(motion);  //send motion state to serial
  Serial.println(led);
 
  if((light &gt; 500) &amp;&amp; (motion == 1)) { //if motion detected and light level below a certain level, do this
    while (led &lt; 255) { //led below full brightness? 
      led++; //increment fade up to full powahs
      analogWrite(LEDPin, led); //write change to LED control Pin into TIP120
      delay(fadeSpeed); 
      break; //need to try this remarked out when arduino is out of testing location
     }
   }   
  else if((motion == 0) &amp;&amp; (led &gt; 0)) { //otherwise if motion not detected and led value is on, fade down
    led--; 
    analogWrite(LEDPin, led);
    delay(fadeSpeed);
 
  }
 
  else {
    // delay(250);
    // Serial.println("delay");
  }
}

Links to some Parts:

2W LEDS – DealExtreme
PIR Sensor
 – Deal Extreme
TIP120 Power Darlington Transistors – Adafruit

Posted in Arduino, Electronics | Tagged , , , , , , | Leave a comment
« Older
Newer »