Home SensorNet Overview

I have an ongoing project that involves my house and sensors. I’ve been working on and off on this as enthusiasm warrants but failing to actually post anything about it on dangertech. So this is it, I’m going to give a general overview interspersed with pictures as a starting point and see what happens. I plan on sensoring the shit out of my home. Sensors in every room that include at a bare minimum Temperature, motion and light levels. There are many more add-ons I want to achieve including Oven temperatures, Freezer temp, Water flow etc etc etc etc. I love stats and cant get enough.

SensorNet aka. Motherhub is an Arduino Mega2560 that runs the network of Xbees and arduinos around the house which so far consists of:

  • Arduino Mega2560 as MotherHub
  • Arduino UNO as data parser from power meter
  • Xbee Co-Ordinator as base unit for Xbee network
  • Outdoor Xbee Temp Sensor that also reports on battery level and solar Voltage
  • CurrentCost Energy Meter measuirng the mains power and outputting to above UNO

Ha. After listing that it doesn’t look like much for the hours of work I’ve poured in. There are also a few projects not completed enough that they are included in the above list:

Arduino UNO Weather unit

  • Wind Speed
  • Wind Direction
  • Rain Gauge
  • Temperature

This one is a little cheaty as it incorporates some Sparkfun parts. The wind and rain sensor are here and a convenient Ardy shield with some nice code on Github are here. To finish this I need to:

  • Xbee hooked up and coded
  • Power requirements calculated to run from solar and a battery
  • Housing designed and printed/built

Arduino House Foyer Sensor Node 

This is all Bread boarded up and tested. It includes:

  • 2 temperature sensors to monitor the hot water cylinder.
  • Room temp and humidity Sensors
  • Light Sensor
  • Motion Sensor

For completion it needs:

  • PCB to be designed and built
  • An enclosure

Arduino Power Monitor Node
This is to replace my CurrentCost device. It has served really well but since adding Solar to the house I need MOAR(tm) control. I currently monitor total power use and the HydroHeat circuits. The new unit will be capable of monitoring 4 circuits. Solar, power and lights, Hydroheat and Total Power consumption. As this sits by the front door it will also need to act as a doorbell, Light sensor, motion sensor and also temperature while communicating wirelessly to MotherHub through an xbee! A busy unit.

Things left to do:

  • Finish circuit board design
  • Enclosure
  • Arduino Code

Data Logging to MySQL and Web Frontend
Motherhub currently logs to Xively here. I want more control of the data and unlimited logging of that data over time which I haven’t seen offered by anyone else yet(for free). I’m sending data from MotherHub to a Python Script running on a Raspberry Pi at the moment. My NAS has an instance of MYSQL running so I log the data there. I could run python on the NAS or even my linux proxy server so save one device and its power consumption (not that the Pi uses much) but future wise I may move all of the sensor processing to the python script and more powerful Pi. Depends how MotherHub can handle 10-20 Xbees sending in packets and all the sensor processing 🙂 I’ve just made good progress on this by getting data into the database. No doubt I have a lot more time to be spent here.

  • Testing Script robustness when accepting data over serial from MotherHub
  • Running script as daemon on the Pi
  • PHP Front end to display graphs

Learning all this as I go but really starting to have fun with it. PCB design and Python being the latest skills I’ve started learning and have to admit enjoying immensely.

This is a great start to Documenting this whole thing! I have more of a plan after putting this to a post. I will do separate posts dealing individually with the different nodes that will include all the finer details of PCB designs and code. I know I said there would be pictures at the top of this post but i think its long enough already. I will add them in to the detailed posts of each arm of the project.If you have read all this then hopefully future posts can help you achieve your own SensorNet 2000 😛 I want to hear about it!

Posted in Arduino, Electronics, Raspberry Pi, SensorNet | Tagged , , , , , | Leave a comment

Water Flow Meter Mk. II


Further News:
Tried it out again today. Could see it ticking by no probs. Judged the flow meter at its pressure and flow rate to be down by 20%. So every 1 litre pumped into a bucket would only report 0.8 litres on the Arduino  This is easily remedied in the Arduino sketch. These flow meters are inaccurate but you can do some controlled tests to improve the accuracy at a certain pressure of water. How much water did I pump you say? Well…… I went a bit low in the tank and sucked up a heap of gunk! The pump loves it but the water flow meter did not. Nothing I did could get it going again. So! Version 3 will require a filter 🙂

A short post requires entertainment:

DvbaGLj


Posted in Fish Pond, Gardening | Tagged , , , , , | Leave a comment

Let’s Get it Pumpin’

While I was away it seems I had some rain at home. Septic is half full again! Blast! Missed out on seeing how the water is getting in.

nz 125

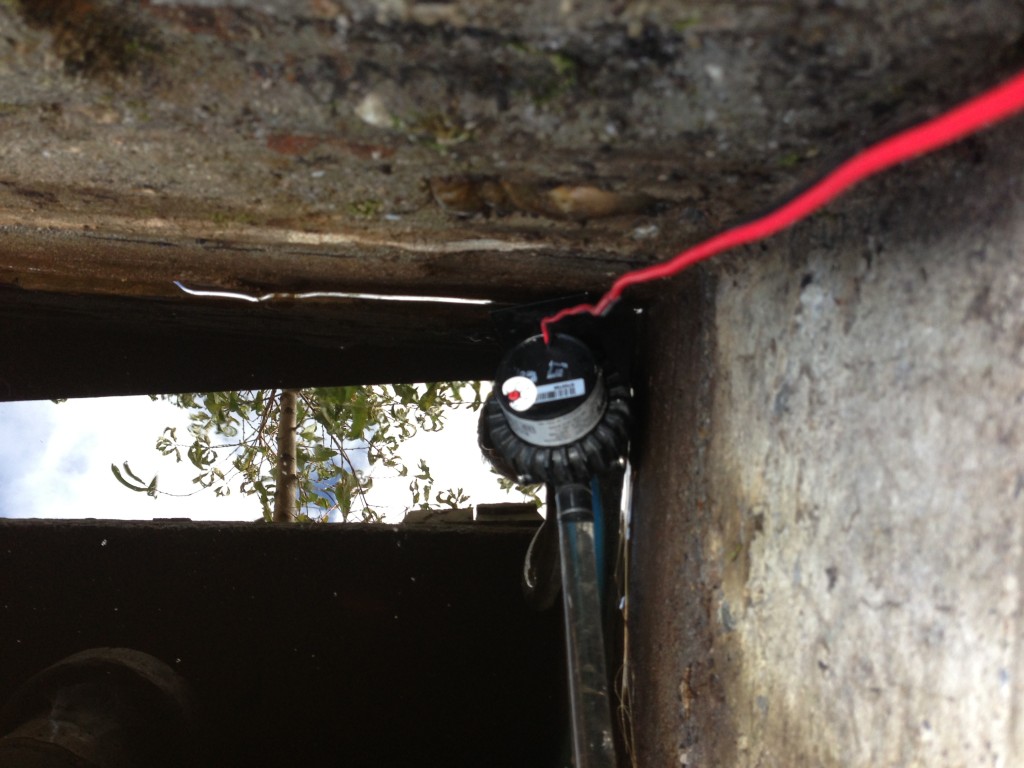
At least I have a good excuse to play with pumps again! This time to spice things up I thought I’d try and monitor how much water gets pumped out! Yeah! You can see in the above shot how small the pump is I’m using…. Does a good job lifting all that water so far.   I slapped this beast together:

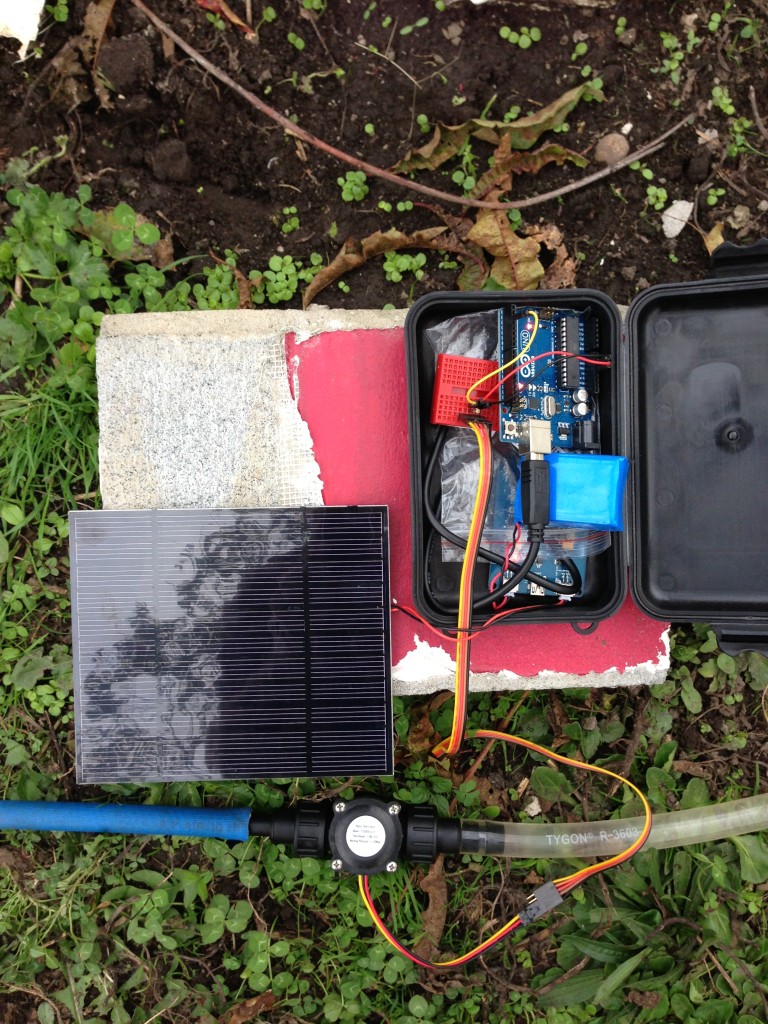
nz 124Crammed in that little box we have a solar lithium battery charger hooked up to a 3.7V 3000mAh Li-ion batter and the biggest solar panel I have laying around….. I forget its watts but know it provides 3.6 on the voltage side of things. This in turn has an Arduino UNO plugged in. Portable powah! Wrangled off that we have a simple cheap water flow meter with a couple of standard poly pipe fittings to attach the hoses to. These can be had from any decent hardware store. It was looking like it may rain thus it all being crammed into the box. The plastic you can see in the box is a precaution to stop any of the circuitry shorting out across the 2 boards.

The pumps in the outlet line and the party is about to start! I had no problem getting the pump primed this time. I dicked around with it a whole lot the last time and got it down pat pretty well. Attach garden hose to output side of hose coming from the pump and push the water flow through backwards until all the air has blown out. Turn pump on and garden hose off and voila! Lots of flow!

nz 123

That pumped happily for a few hours no problems. Just on dark though it started to really rain so I packed the gear up just short of the tank being empty. No probs! I have stats to check off the Arduino! After unpacking it from the box carefully I realized a flaw in my plan….. How was I do get the data out of it? Ha! Foiled! Rebooting the Arduino would wipe said data. OK that’s great Ill just hook it up to USB and turn the serial port viewer on….NO! That auto causes the Arduino to reboot! Luckily the code I used verbatim from Adafruit had a 2×16 LCD hooked up to it that I decided not to bother with. Cool, cool. A bit more time and we were away…

nz 128


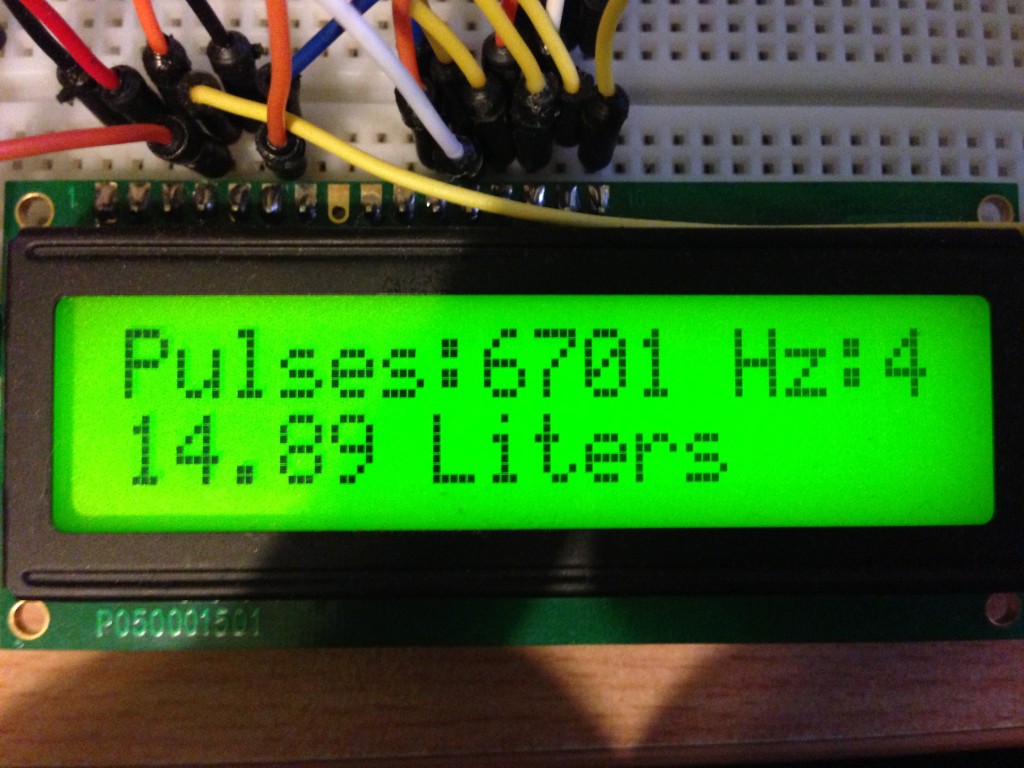
14.89 Litres?!?!?!?!! What is this black magic! Look at that water flowing in the pic up the page. That’s hundreds of litres over a few hours! Hundreds! I think what happened, and I’m sad to say it but I must of temporarily knocked the power from the little bread board or something. That or there wasn’t enough pressure to spin the water meter. So first attempt = Fail. Second attempt tomorrow shall wield better results. I can monitor it live with the LCD hooked up now.

Here is the code used from Adafruit. You can buy many fantastic things from there so go do it and support a great company /plug over

1
2
3
4
5
6
7
8
9
10
11
12
13
14
15
16
17
18
19
20
21
22
23
24
25
26
27
28
29
30
31
32
33
34
35
36
37
38
39
40
41
42
43
44
45
46
47
48
49
50
51
52
53
54
55
56
57
58
59
60
61
62
63
64
65
66
67
68
69
70
71
72
73
74
75
76
77
78
79
80
81
82
83
84
85
86
87
88
89
90
91
92
93
94
95
96
97
98
99
100
101
102
103
104
105
106
107
/**********************************************************
This is example code for using the Adafruit liquid flow meters. 
 
Tested and works great with the Adafruit plastic and brass meters
    ------> http://www.adafruit.com/products/828
    ------> http://www.adafruit.com/products/833
 
Connect the red wire to +5V, 
the black wire to common ground 
and the yellow sensor wire to pin #2
 
Adafruit invests time and resources providing this open source code, 
please support Adafruit and open-source hardware by purchasing 
products from Adafruit!
 
Written by Limor Fried/Ladyada  for Adafruit Industries.  
BSD license, check license.txt for more information
All text above must be included in any redistribution
**********************************************************/
#include "LiquidCrystal.h"
LiquidCrystal lcd(7, 8, 9, 10, 11, 12);
 
// which pin to use for reading the sensor? can use any pin!
#define FLOWSENSORPIN 2
 
// count how many pulses!
volatile uint16_t pulses = 0;
// track the state of the pulse pin
volatile uint8_t lastflowpinstate;
// you can try to keep time of how long it is between pulses
volatile uint32_t lastflowratetimer = 0;
// and use that to calculate a flow rate
volatile float flowrate;
// Interrupt is called once a millisecond, looks for any pulses from the sensor!
SIGNAL(TIMER0_COMPA_vect) {
  uint8_t x = digitalRead(FLOWSENSORPIN);
 
  if (x == lastflowpinstate) {
    lastflowratetimer++;
    return; // nothing changed!
  }
 
  if (x == HIGH) {
    //low to high transition!
    pulses++;
  }
  lastflowpinstate = x;
  flowrate = 1000.0;
  flowrate /= lastflowratetimer;  // in hertz
  lastflowratetimer = 0;
}
 
void useInterrupt(boolean v) {
  if (v) {
    // Timer0 is already used for millis() - we'll just interrupt somewhere
    // in the middle and call the "Compare A" function above
    OCR0A = 0xAF;
    TIMSK0 |= _BV(OCIE0A);
  } else {
    // do not call the interrupt function COMPA anymore
    TIMSK0 &= ~_BV(OCIE0A);
  }
}
 
void setup() {
   Serial.begin(9600);
   Serial.print("Flow sensor test!");
   lcd.begin(16, 2);
 
   pinMode(FLOWSENSORPIN, INPUT);
   digitalWrite(FLOWSENSORPIN, HIGH);
   lastflowpinstate = digitalRead(FLOWSENSORPIN);
   useInterrupt(true);
}
 
void loop()                     // run over and over again
{ 
  lcd.setCursor(0, 0);
  lcd.print("Pulses:"); lcd.print(pulses, DEC);
  lcd.print(" Hz:");
  lcd.print(flowrate);
  //lcd.print(flowrate);
  Serial.print("Freq: "); Serial.println(flowrate);
  Serial.print("Pulses: "); Serial.println(pulses, DEC);
 
  // if a plastic sensor use the following calculation
  // Sensor Frequency (Hz) = 7.5 * Q (Liters/min)
  // Liters = Q * time elapsed (seconds) / 60 (seconds/minute)
  // Liters = (Frequency (Pulses/second) / 7.5) * time elapsed (seconds) / 60
  // Liters = Pulses / (7.5 * 60)
  float liters = pulses;
  liters /= 7.5;
  liters /= 60.0;
 
/*
  // if a brass sensor use the following calculation
  float liters = pulses;
  liters /= 8.1;
  liters -= 6;
  liters /= 60.0;
*/
  Serial.print(liters); Serial.println(" Liters");
  lcd.setCursor(0, 1);
  lcd.print(liters); lcd.print(" Litres        ");
 
  delay(100);
}
Posted in Arduino, Electronics, Fish Pond, Gardening | Tagged , , , , , , , , | Leave a comment

Things to do with an old Septic Tank

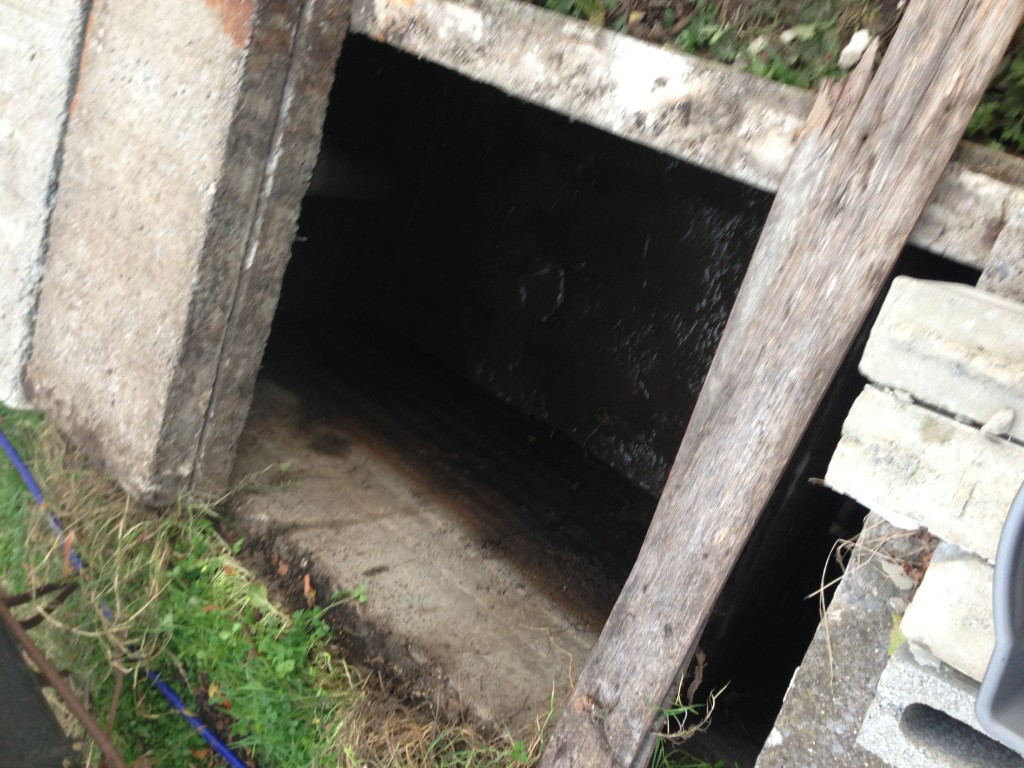
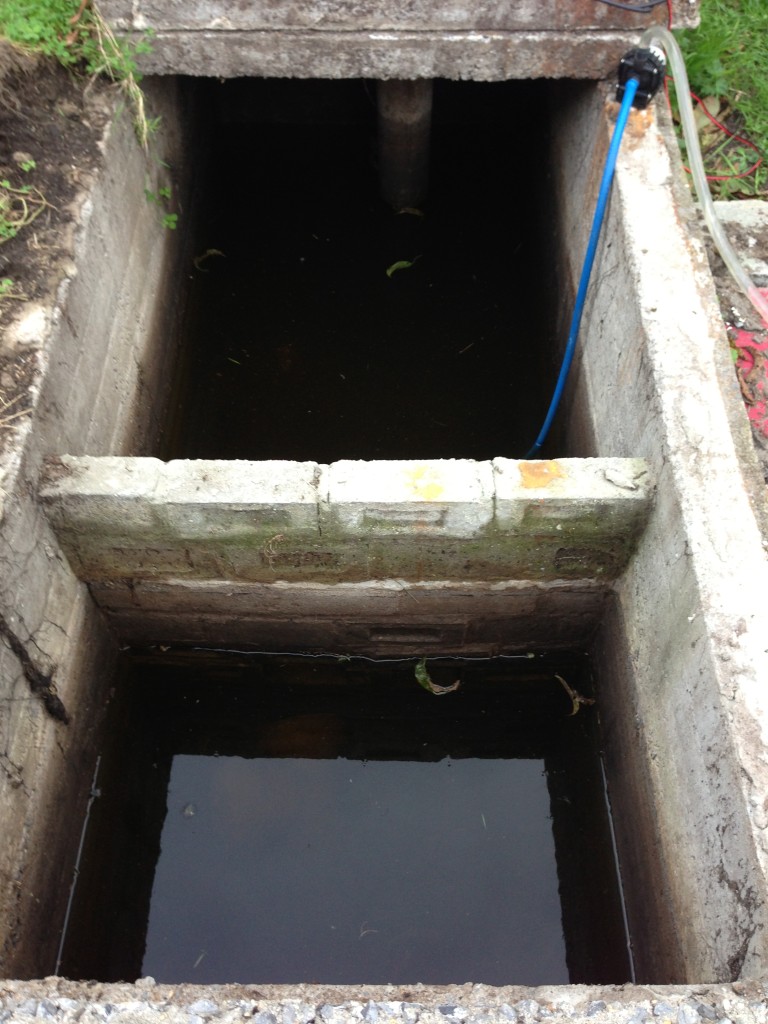
There is an old concrete Septic tank rearing its head out of the ground in the backyard. The only constructive thing I could think of to utilize it better is make a pond. Other than hiding bodies that is. I popped one of the concrete slabs off the top some time ago to see what could be seen. Lots of mosquito lavae and a roughly 2 metre deep concrete box! Short term I purchased 6 goldfish to put in there to wage war against the mosquito horde that was breeding in there. They did a terribly efficient job of that. and am happy to say about a year later 4 very fat healthy goldfish were removed from the tank! I imagine given some time the gold fish will grow quite large given the huge tank they have.


IMG_0773


The water and bottom of the tank were quite clean as the tank has not been used for quite sometime in an effluent nature. Scraping around in the bottom of the tank didn’t stir up anything initially. I’ve been giving the backyard a bit of an overhaul lately and decided that while I was working on some other things out there I may as well be draining the tank. I had previously swapped an old computer motherboard I wasn’t using for a water pump that was also being used in a water cooling setup for a computer. The plan being to use it to pump out the water in the septic one day. The little blighter did a bloody good job considering the amount of lift it had to pump up. It took a bit of fiddling to get all the air out but a bit of Macgyver action involving some poly pipe fittings and garden hoses soon had a reliable way of priming the pump. It basically involved hooking the mains water up to the pump outlet pipe and forcing through a heap of water to clear the air locks then disconnecting the outlet pipe to let the water flow in the right direction.

IMG_0764

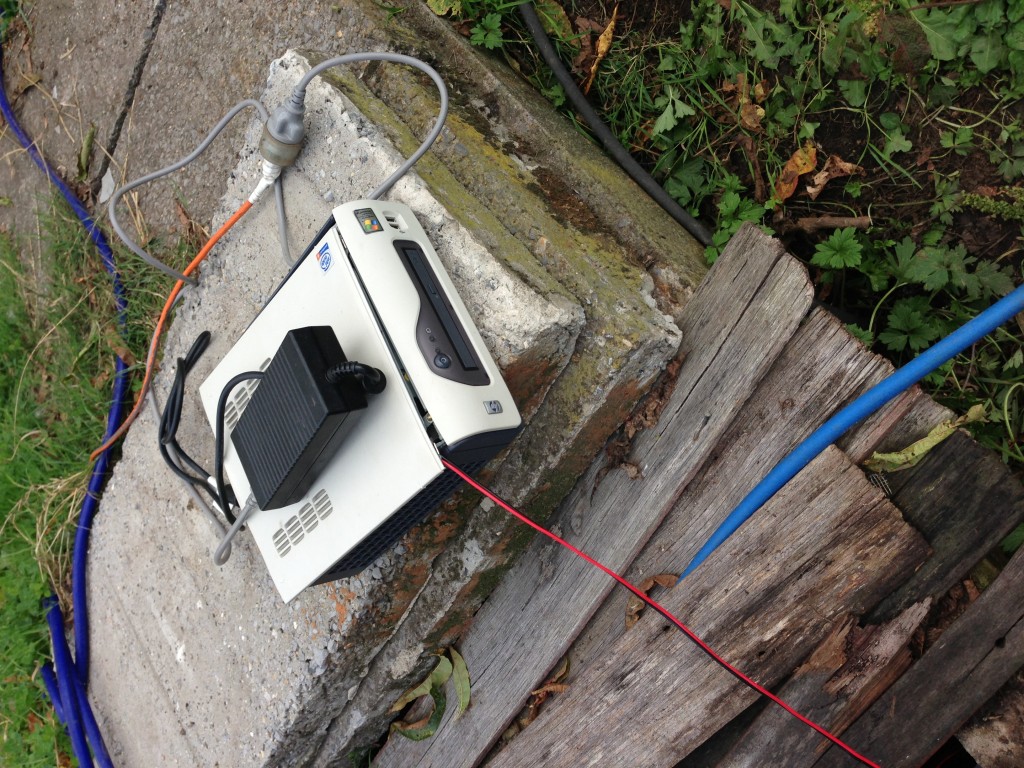
Being used in a PC meant the pump was 12 volts. I know I have some old ATX power supplies around somewhere but a quick look revealed I had no idea which tub they were stored in. So I just grabbed an old PC I had handy and popped the side off to connect the pump to one of the convenient molex connectors within. Nice small form factor made it a breeze to carry in and out of the shed a couple of time.

IMG_0765

You can see it had quite an output at first when the water was closer to the top. This steadily declined as the water level in the tank dropped. It had the tank pumped out with only a few centremetres of water left above the mud that had accumulated in the year or so since I first popped open the tank. You can see below also Kaiser Helping excavate a drainage ditch to stop the water accumulating.

IMG_0760

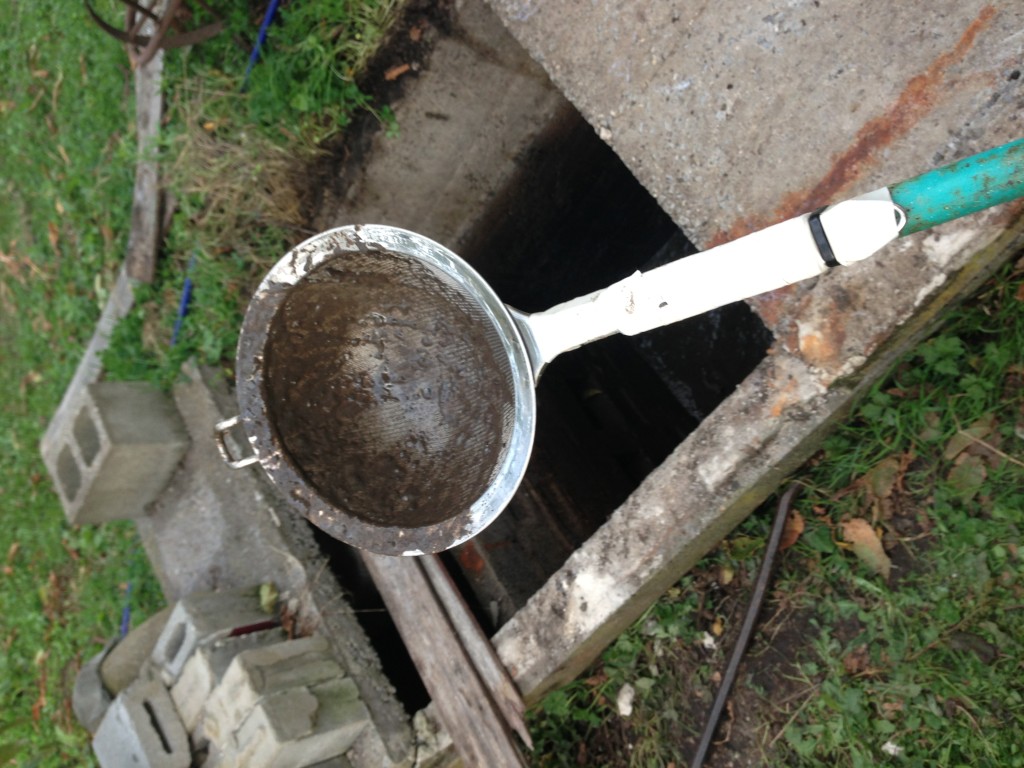
While it was busy being emptied I swondered how the hell I was going to get the fish out with not even a small net handy. Kitchen sieve macgyvered onto an old paint roller handle to the rescue! (Note to self: Buy new Kitchen Sieve before anyone notices it missing) This worked well! Also managed to scoop out some of the mud at the bottom. Mainly old leaves and nectarines that had fallen in from the overhanging nectarine tree.

IMG_0772


The tank is all empty now the next steps are to block off the inlet and outlet pipes inside so the tank can fill right up to the brim. It currently fills up from ground water seeping in to about 20cm from the top, it will then slowly seep out to about 40-50cm below the top line after some time with no rain. Hopefully it will rain soon too so I can monitor where the water gets into the tank. I imagine it simply soaks through the cement. It’s possible its coming in through the inlet or something weird though. The house was built in the 1940’s so who knows? I do know the tank remains consistently full all year so there doesn’t seem to be much of a problem with water draining out of it. Once i know it can retain water to the brim I have my eye on some sheets of 100 x 100mm  square high tensile mesh. I’ll cut this to size and dynabolt it into the tank about a foot down from the top of the tank. This is for safety reasons. There’s nothing like a 2 metre pit of doom to keep you on your toes. I could also never let any kids near the back yard unsupervised with a clear conscious. It will however give somewhere to put some water plant pots and still allow the fish to swim through when they turn into giant mutant sized terrors of the deep.

Just waiting on some rain now….

Posted in Fish Pond, Gardening | Tagged , , , , , , | 2 Comments