Sidetracked with LED’s

I was playing with some TIP120 Power Darlington transistors trying to bend them to my will, when I got completely sidetracked….. sort of, with Some 2W LED’s I got a while ago.

IMG_0791


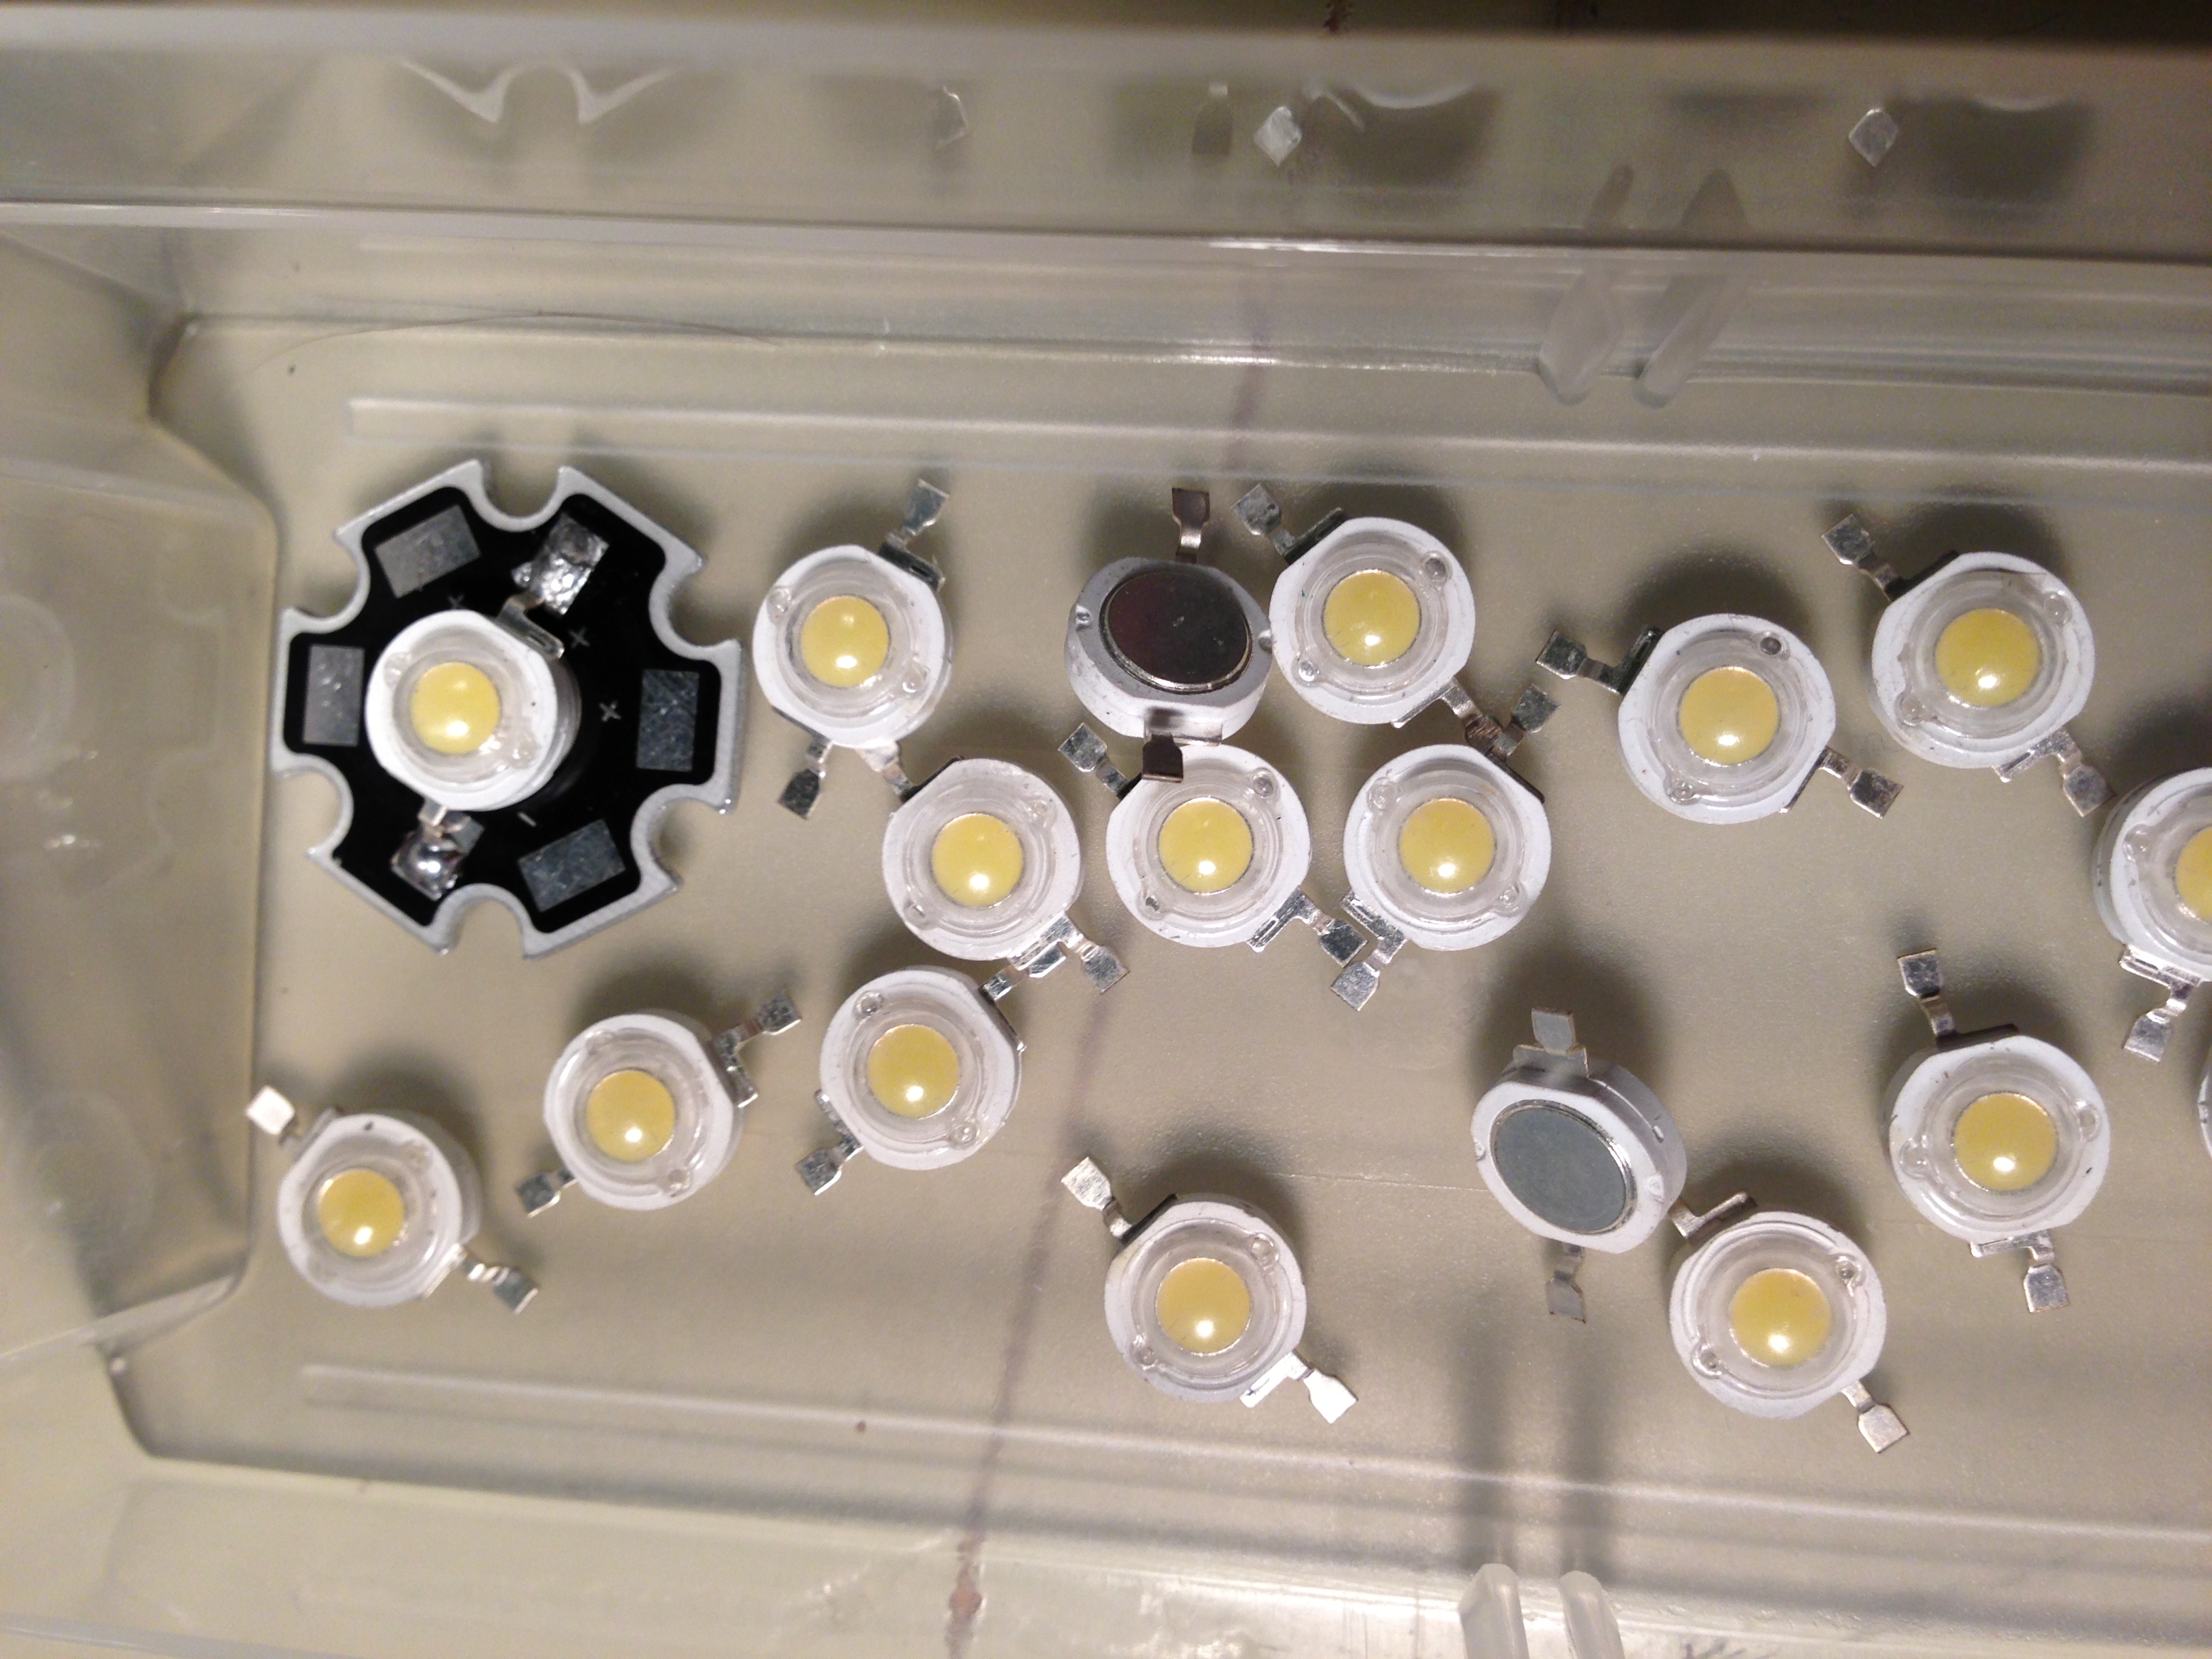
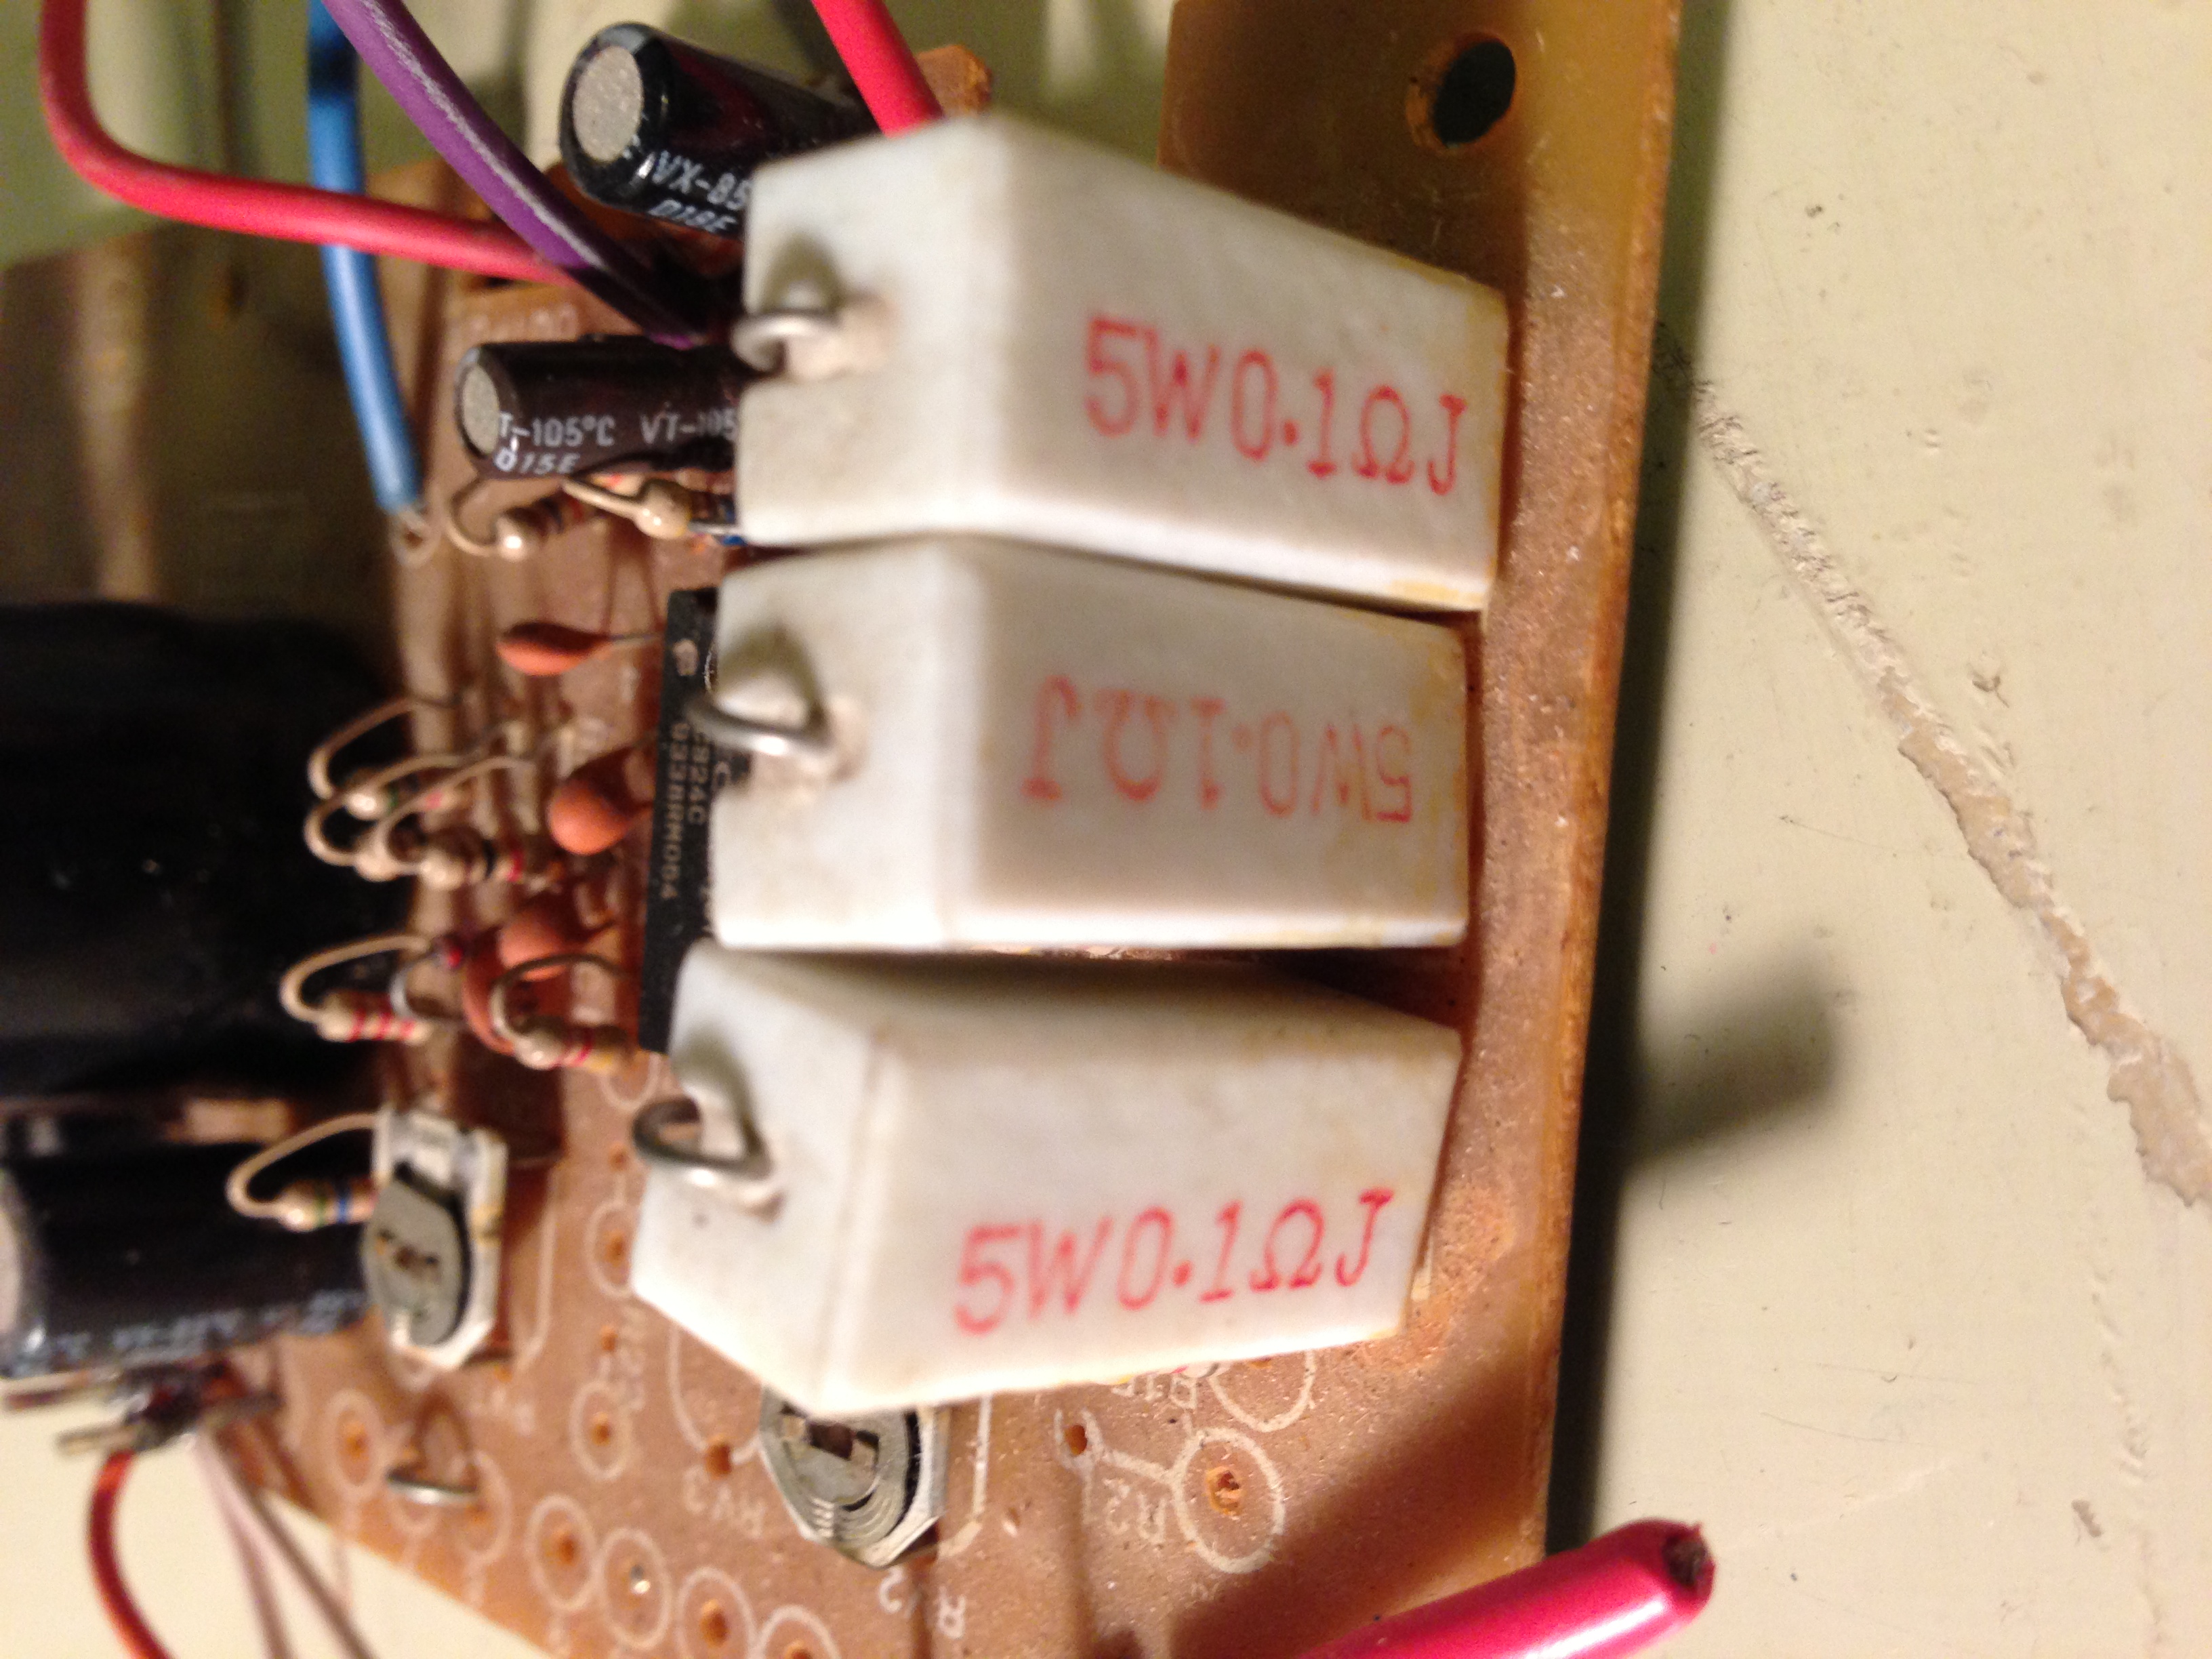
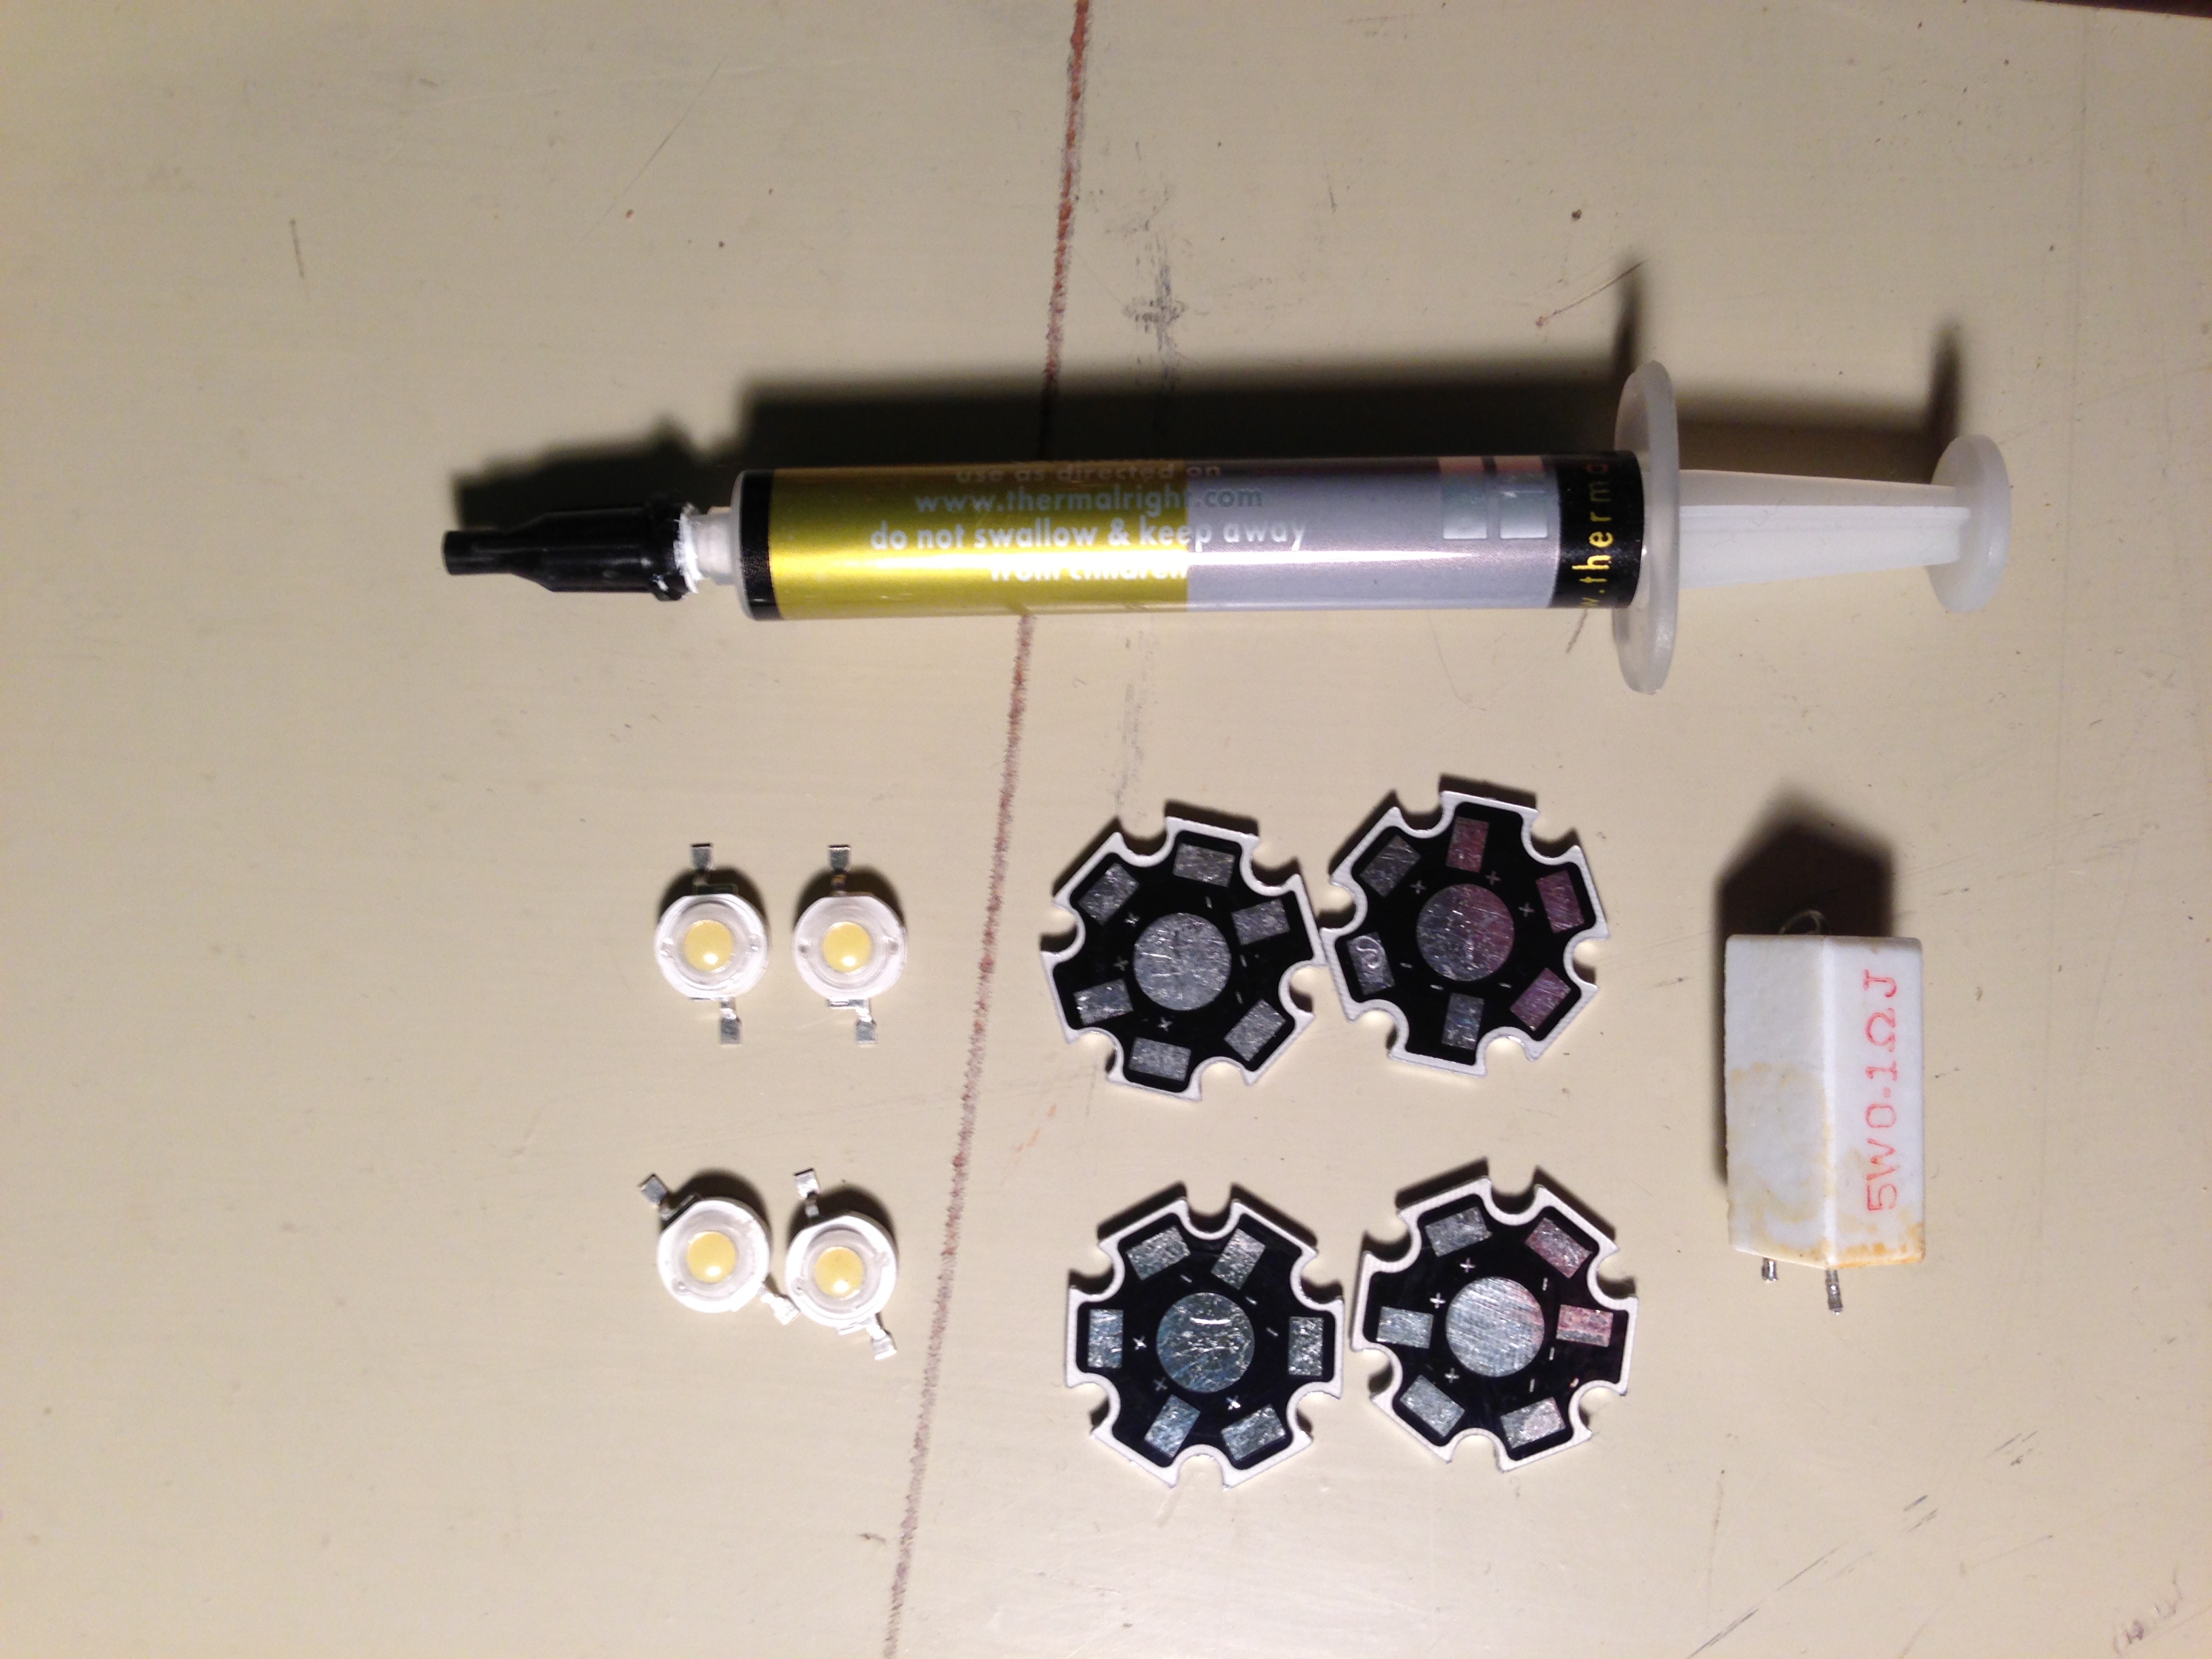
These bad boys need to be soldered onto a heat sink as they get pretty hot and die quickly without anyway to dissipate the heat. Luckily i have a billion of them handy. The tricky thing is I need a 1 Ohm resistor….. Lowest I have is a 220 Ohm one (Sad Panda) I remember this huge bad boy resistor from a power supply that was beyond repair (transformer blown) I dug it up and actually found what I needed! There were 3 x 1 Ohm 5W resistors on it! Perfect. Desoldered them and grabbed some thermal compound. Have everything I need now!

IMG_0790

IMG_0792
Once I put them all together I attached them to 12V of Powah to see what we got…

IMG_0795

IMG_0796

The Camera did a great job of turning the Mini Sun into something vaguely view-able in a picture. Every time I glance at it I’m blinded in that part of my eye. Har. Anyway I got sidetracked into this by trying to run a 12V strip of LED’s through the TIP120 so I could fade it in and out. For some reason though whether I pump 12V into it or 15 I am only seeing around 7V entering the LED strip. Whats going on! I needed something else 12V for some testing. 2W LEDs it was! Specs of the 2W LEDs are:

– Power: 2W
– Rated voltage: DC 3.0V~3.2V
– Rated current: 600~650mA
– Brightness: 160~180LM
– Color temperature: 2850~3050K

12V (Supply Voltage)/3V (Rated Voltage) =12V

LEDs always need a resistor in series with them to stop thermal runaway. Other wise I believe, as the LED heats up its resistance lowers allowing more current, which makes it heat up more, which lowers its resistance more, repeat, repeat, supernova. While not necessarily causing a popped LED straight away it will lower the life of the LED considerably. (Disclaimer this info is dredged up from parts of my Brain that are quite old and could be totally wrong! Please correct me if I’m wrong!) The value of the resistor you need to use will change depending on your LED specs and voltage used. Just google for a LED calculator and save yourself some maths.


Anyhoo! Back on track. Using an Arduino Uno and a TIP120 Darlington transistor I setup the same fade I was trying to use on the strip. Low and behold….. Its working fine. I’ll need to grab the data sheet for the TIP120 and see if I can figure out whats going on. I imagine I’m overloading it perhaps.


the Arduino can only supply 5V and around 40mA of current on its Pins so you can’t just run huge Loads of its pins directly. This is where the TIP120 comes in! Using a PWM Pin on the Arduino you can alter the Pins output to vary the voltage output which the TIP120 can use to step your larger voltage by! For example 1V output on the Arduino could be 8V from the Darlington transistor. This can vary on the type of transistor you have of course, check the data sheet.

A video of the pulsing can be seen on YouTube here. I cant figure out how to embed it right now and its getting late!. The humanity! Will come back and fix it later. The fade isn’t quite the whole range of the pulse. I’ve taken the min and max into around 50 –  230

Here is my Arduino code:

#define LEDPin 6
#define onboardLED 13

#define fadeSpeed 10

void setup() {

pinMode(LEDPin, OUTPUT);
pinMode(onboardLED, OUTPUT);
Serial.begin(9600);
}

void loop() {
int led;

// Fade in
for (led = 30; led < 230; led++) {
analogWrite(LEDPin, led);
analogWrite(onboardLED, led);
delay(fadeSpeed);
Serial.println( led );
}

//Fade out
for (led = 230; led > 30; led–) {
analogWrite(LEDPin, led);
analogWrite(onboardLED, led);
delay(fadeSpeed);
Serial.println( led );
}
}

This is all part of a project for some LED lighting around the house hooked up to some motion detectors and LDRs (Light Detecting Resistors?) Instead of just lights on, lights off a nice gentle fade in and out at specified times will look a treat! Moar later!


Posted in Arduino, Electronics | Tagged , , | 1 Comment

Things to do with an old Septic Tank

There is an old concrete Septic tank rearing its head out of the ground in the backyard. The only constructive thing I could think of to utilize it better is make a pond. Other than hiding bodies that is. I popped one of the concrete slabs off the top some time ago to see what could be seen. Lots of mosquito lavae and a roughly 2 metre deep concrete box! Short term I purchased 6 goldfish to put in there to wage war against the mosquito horde that was breeding in there. They did a terribly efficient job of that. and am happy to say about a year later 4 very fat healthy goldfish were removed from the tank! I imagine given some time the gold fish will grow quite large given the huge tank they have.


IMG_0773


The water and bottom of the tank were quite clean as the tank has not been used for quite sometime in an effluent nature. Scraping around in the bottom of the tank didn’t stir up anything initially. I’ve been giving the backyard a bit of an overhaul lately and decided that while I was working on some other things out there I may as well be draining the tank. I had previously swapped an old computer motherboard I wasn’t using for a water pump that was also being used in a water cooling setup for a computer. The plan being to use it to pump out the water in the septic one day. The little blighter did a bloody good job considering the amount of lift it had to pump up. It took a bit of fiddling to get all the air out but a bit of Macgyver action involving some poly pipe fittings and garden hoses soon had a reliable way of priming the pump. It basically involved hooking the mains water up to the pump outlet pipe and forcing through a heap of water to clear the air locks then disconnecting the outlet pipe to let the water flow in the right direction.

IMG_0764

Being used in a PC meant the pump was 12 volts. I know I have some old ATX power supplies around somewhere but a quick look revealed I had no idea which tub they were stored in. So I just grabbed an old PC I had handy and popped the side off to connect the pump to one of the convenient molex connectors within. Nice small form factor made it a breeze to carry in and out of the shed a couple of time.

IMG_0765

You can see it had quite an output at first when the water was closer to the top. This steadily declined as the water level in the tank dropped. It had the tank pumped out with only a few centremetres of water left above the mud that had accumulated in the year or so since I first popped open the tank. You can see below also Kaiser Helping excavate a drainage ditch to stop the water accumulating.

IMG_0760

While it was busy being emptied I swondered how the hell I was going to get the fish out with not even a small net handy. Kitchen sieve macgyvered onto an old paint roller handle to the rescue! (Note to self: Buy new Kitchen Sieve before anyone notices it missing) This worked well! Also managed to scoop out some of the mud at the bottom. Mainly old leaves and nectarines that had fallen in from the overhanging nectarine tree.

IMG_0772


The tank is all empty now the next steps are to block off the inlet and outlet pipes inside so the tank can fill right up to the brim. It currently fills up from ground water seeping in to about 20cm from the top, it will then slowly seep out to about 40-50cm below the top line after some time with no rain. Hopefully it will rain soon too so I can monitor where the water gets into the tank. I imagine it simply soaks through the cement. It’s possible its coming in through the inlet or something weird though. The house was built in the 1940’s so who knows? I do know the tank remains consistently full all year so there doesn’t seem to be much of a problem with water draining out of it. Once i know it can retain water to the brim I have my eye on some sheets of 100 x 100mm  square high tensile mesh. I’ll cut this to size and dynabolt it into the tank about a foot down from the top of the tank. This is for safety reasons. There’s nothing like a 2 metre pit of doom to keep you on your toes. I could also never let any kids near the back yard unsupervised with a clear conscious. It will however give somewhere to put some water plant pots and still allow the fish to swim through when they turn into giant mutant sized terrors of the deep.

Just waiting on some rain now….

Posted in Fish Pond, Gardening | Tagged , , , , , , | 2 Comments

Behemoth Mystery Bulbs

I was happily digging away at some bulbs I need to relocate/give away when BAM! I came across some MONSTER bulbs! I’m not sure what they are but have a feeling they are Agapantha bulbs. This is strange however as they dont quite look the same as the bottoms of the Agapanthas I have growing elsewhere. Also they appear to have been dormant for some time. Maybe because they were wedged in a pack of the other bulbs I was clearing.

Here is what I’m talking about:

IMG_0752 IMG_0753


It’s a Behemoth! I’ll chuck it in a pot soon and see what we get. In the meantime, does anyone know what it is?

Posted in Gardening | Tagged , , | Leave a comment
Newer »